This week, we have an update around Adding Payments on raised invoices, which is relevant to ALL Business Pilot users.
For customers who utilise our Xero integration, we have a number of new enhancements for you as well as an update to your settings that needs to be actioned by you or your team ASAP to maintain the connection with your Xero system.
The development work on our new Blink Payment integration has required some changes to be made to our Xero API and to how we add payments to invoices, so we’ve taken the opportunity to implement some additional improvements to benefit all users.
Please note that these changes will be going live tonight (26 November 2024) so will be ready to use from tomorrow morning (27 November 2024).
FOR ALL BUSINESS PILOT USERS
Created/Raised Invoices & Adding Payments
When you access a created or raised invoice, you will see that changes have been made to the Payments and Invoice Items tables.
The existing layout has been replaced with a tab functionality and you can find tabs for Invoice Items and Payments in the ‘Edit Invoice’ window as shown here:

You can choose the Invoice Items tab to see the line items assigned to the invoice.
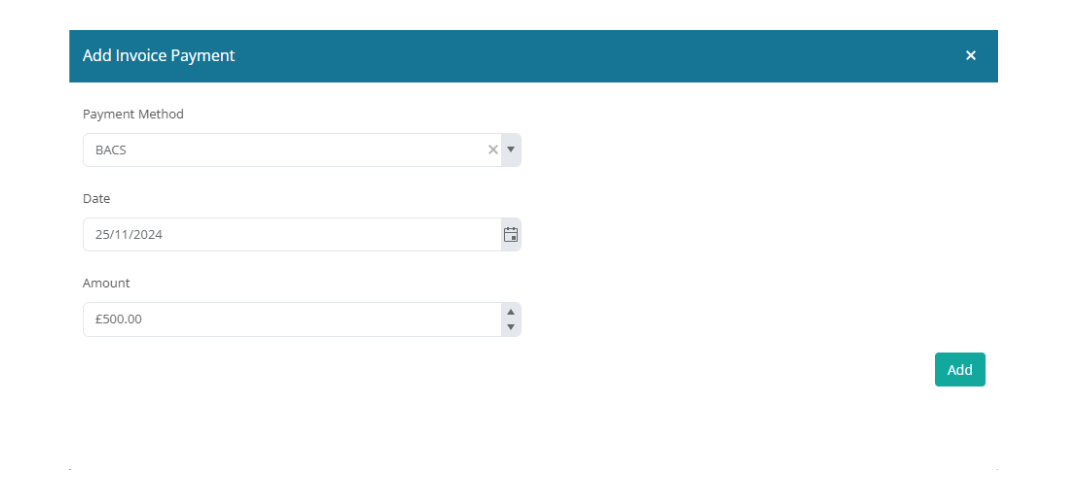
Payments are now added under the Payments tab on a raised invoice. Click the ‘Actions’ button (shown above) and choose ‘Add Payment’. This is done via a new Payment window:

You will see the impact of this payment on the invoice once you hit ‘Add’.

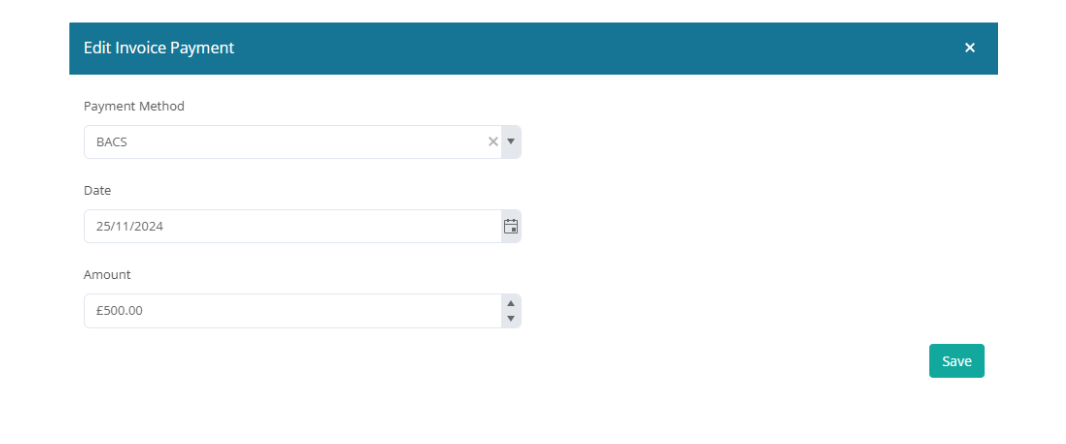
If an error is made when you are adding a Payment, you can update, edit or delete in the window as required, just as you could in the previous Payments table.

Please also note that when a payment is added to an invoice, it will update to show the impact of the payment in this window straight away, without you needing to hit ‘Save Details’, so you can double-check everything is correct.
FOR XERO-ENABLED SYSTEMS
VERY IMPORTANT INFORMATION FOR XERO USERS
All Xero integration system users must now have a Xero Bank Account set-up for the API to continue to work. Please action this as soon as possible to maintain the connection between Business Pilot and Xero.
To set-up your Xero Bank Account, go to Admin > System Integrations > Xero

The default bank account must be set. You may also add any other bank options you have connected to Xero.
When this has been created, you can also set your Xero Bank Account default option for each of your Invoice Types. Go to Admin > Finance > Invoice Types

Xero & Business Pilot System Live Syncing
To improve the functionality of our connection with Xero, the API has been updated to allow more live syncing of information across both systems. This means that both systems will now show your ‘live’ information when it comes to manual payments and raised invoice details.
Manual Payments Enabled in Business Pilot synced to Xero
This is a great new feature to allow payments to be added directly on Business Pilot rather than waiting for them to be reconciled in Xero.
When you add a Manual Payment on a raised invoice in Business Pilot, this will also push through to Xero straight away, so the information is live in your Xero system immediately.
This can be reconciled in Xero in the normal way for complete accuracy.
Live Xero information
When raised invoices are accessed in Business Pilot, the system will perform a sync with Xero to ensure we have the most update information from both systems for any payments or revisions related to that invoice, so you always have the full picture.
XERO UPDATES IN BUSINESS PILOT
Xero column in Contact grids
In the Contacts grids, we have added a new column called ‘Connected to Xero?’ which shows whether the contact in Business Pilot has been connected to a contact in Xero.
This column is hidden by default, but to show it, click the three dots at the top of any Contact grid column header, go to columns and tick ‘Connected to Xero?’ from the dropdown list.

Xero connected status in Contacts
You can now see additional Xero information within a Contact.
When you are in a Contact that is connected to Xero, hover over the Xero Connected Status in the top-right of the window. You will see that a box appears showing the Contact’s Xero ID.

Xero invoice identifier
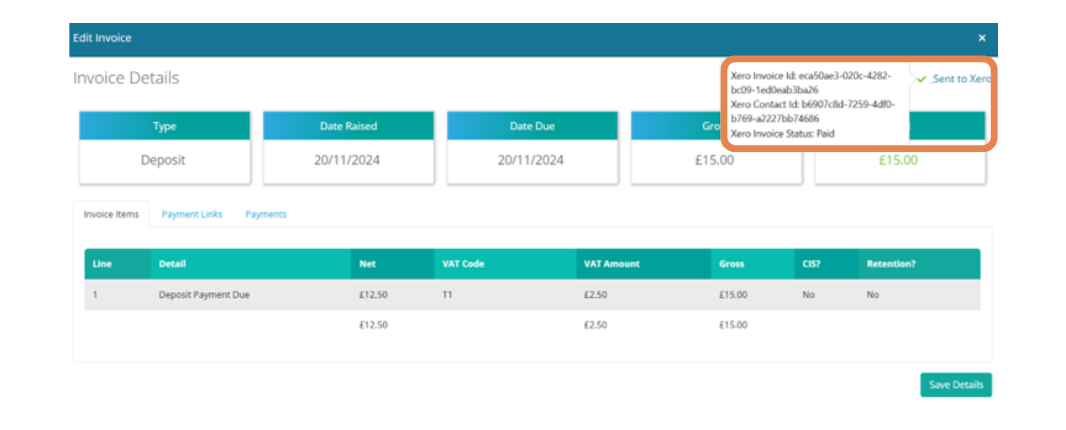
Similarly, in the invoice area, when you select an invoice, you can now hover over the Xero Connected Status in the top right of the window to show the Xero invoice ID, Xero contact ID and Xero invoice status.

If you have any queries or need any help with these latest updates, or integrations please contact our support team via the live chat button, or on 0333 050 7632.