In order to integrate Business Pilot with Zapier, you will need to use your Business Pilot User API Key.
Before you begin this integration, please ensure that you have a Zapier account set-up.
When you set up the account, you will need to use an email that is associated with a user in your Business Pilot system.
For the vast majority of Triggers and Actions, you will only need one account to use with Zapier, so we recommend using an account with Super Admin privileges.
When you first sign up to Zapier, you will be asked a series of questions – you can choose to skip these or answer them to tailor your experience with Zapier.
Head here for our advice on which Zapier plan to choose to get started.
Getting Started
In Zapier, select ‘Zaps’ in the left-hand menu or click ‘+Create’ then Zaps.
This will take you to your dashboard.
Note: If you plan to create a few different Zaps to integrate with different Apps that you use in your business, it might be an idea to set up folders to keep these organised. 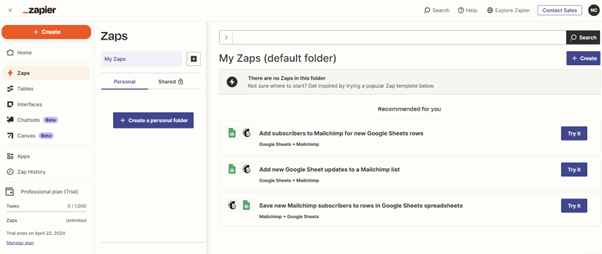
To create your first Zap, click the ‘+Create’ button next to My Zaps (default folder) which will show this screen:
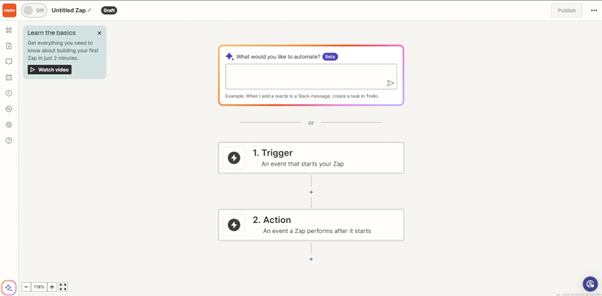
We recommend not using the highlighted ‘what would you like to automate’ dialogue box as it doesn’t always give the best results.
Instead, we’re going to set-up our Zap manually. All Zaps start with a trigger in one system or App that creates an action in another App – click here for more detailed information on how Triggers & Actions work.
Next, Create Your Trigger
Click on the 1. Trigger box and in the search box type Business Pilot. You should see the below screen:

Now click on Business Pilot.
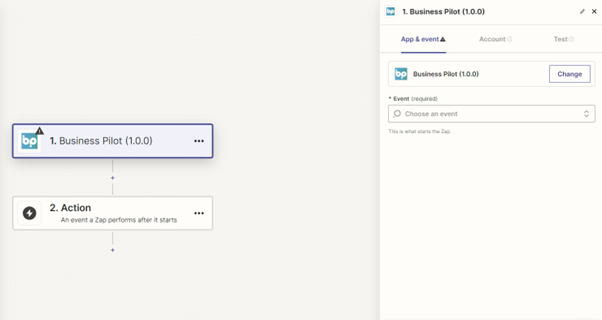
In the event section on the right-hand side you will see a variety of triggers available. For this example, we are going to select ‘New Contacts’

Then choose ‘continue’ Then you will need to connect your Business Pilot system to Zapier. If you have already integrated your Zapier account with Business Pilot, you can skip this next step.
Connect Business Pilot to Zapier
First, find your user API Key
To find your user API Key, sign into Business Pilot, using the account/email address you have used to sign up to Zapier.
Please note: in order to connect successfully you should use a Business Pilot account which has Super Admin privileges.
When you are signed in, head to the profile icon in the top right-hand side of your screen and select ‘Manage Settings’

Scroll to find your User API Credentials. Here you will find your User Id and API Key. We need the API Key. TIP: Click the blue copy icon to the right of the box to copy your API Key.

Inputting your API Key in Zapier
Now, head back into Zapier. When you click to sign in, you will have a window like this, asking you to enter the API key that you have just copied from your Business Pilot system.
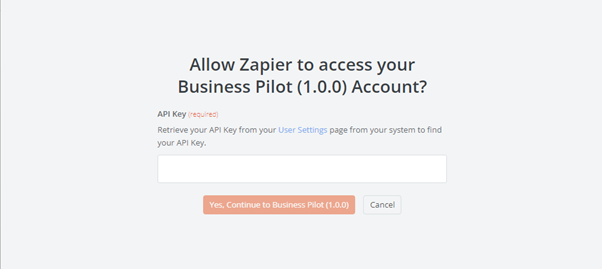
Paste in the key and then click Yes, Continue.

Now click continue to complete the connection to your Business Pilot system.
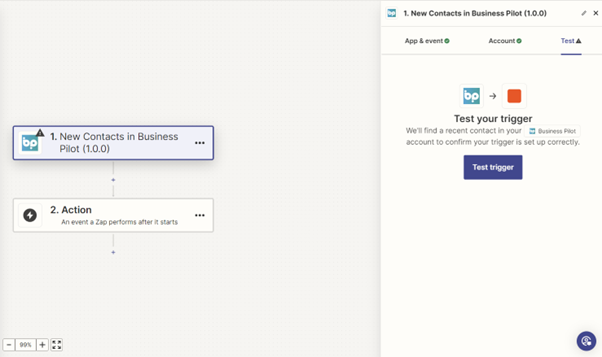
Testing Your Trigger
Now you will be able to test your Zap Trigger.
Select the Test Trigger button.
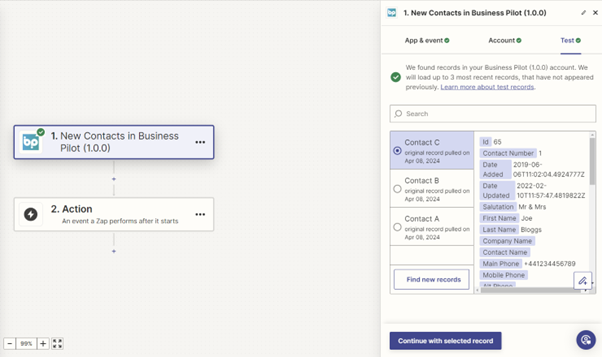
In this window, you can see an example of some of the records that running the Trigger test has found. Select one and continue with the selected record.
The next step will show a window for you to decide the Action that you want your Zap to take when you wish to perform every time Zapier finds a New Contact in BP.
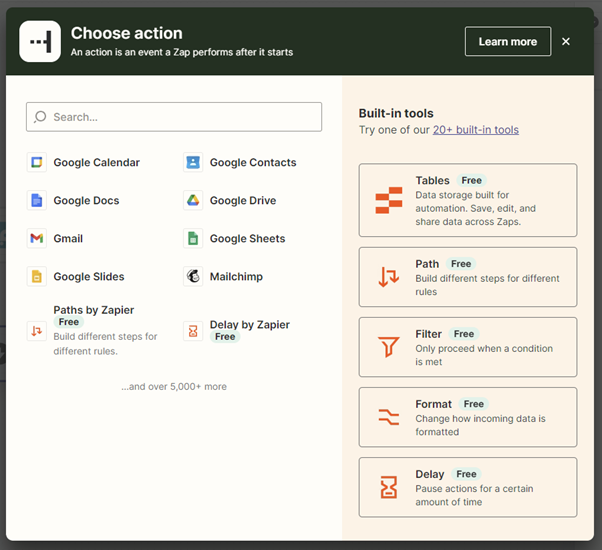
There are thousands of Apps to choose from, so this is where it gets really exciting.
For this example, we’re going to select Google Sheets. So this Zap will push a row on to a Google Sheet every time a new contact is found in Business Pilot.
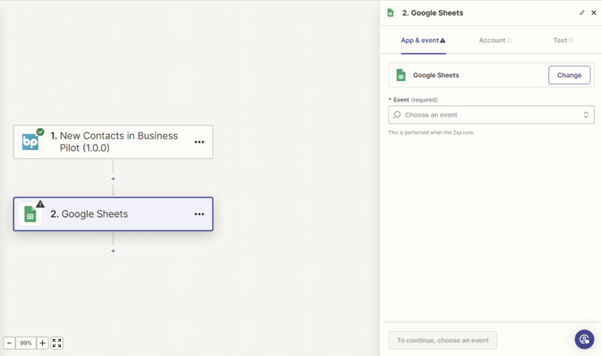
Under ‘Event’, we will choose: Create Spreadsheet Row
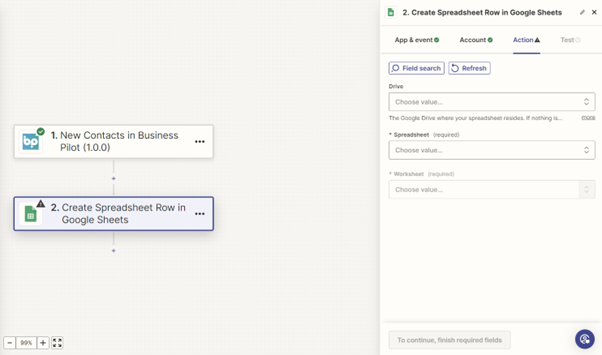
Then Zapier will ask us to sign into Google to connect and find a sheet.
Note: we recommend creating the Sheet in your Google workspace before signing in When you have done this, you will see this window:
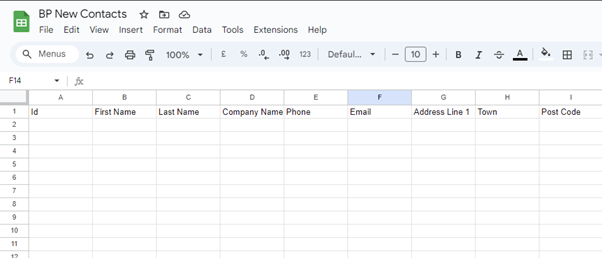
Here is a Google Sheet example with column headings:
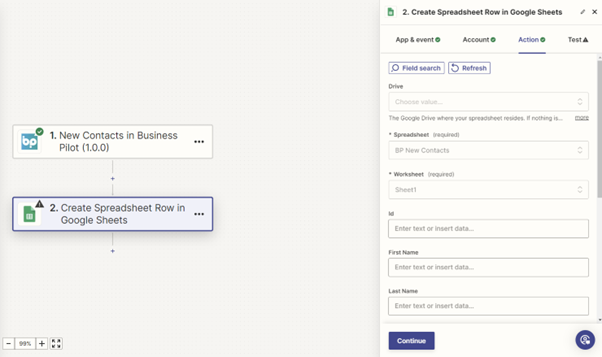
Back in Zapier you can now select your drive, the sheet you just created and the workbook.
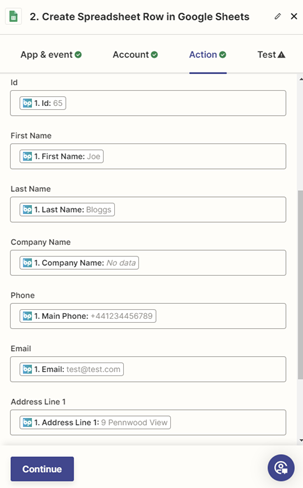
It will now list the columns you have in your sheet and for each one ask you to map (or match) the fields from the BP contact – as shown here:
When your fields are mapped, click continue to see this window. Click the ‘Test step’ button to test your action by sending the selected record to your Google Sheet.

When successful, you will be able to see that the Trigger and Action have caused the record to be sent from Business Pilot to Google Sheets.
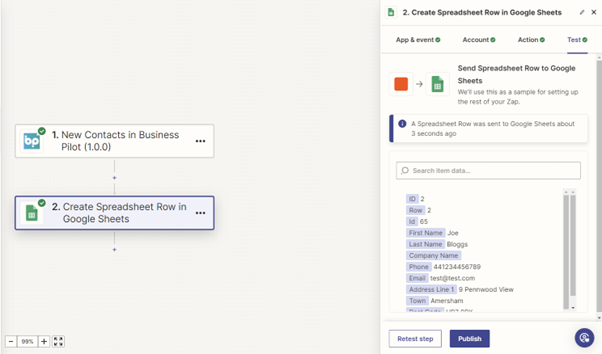
We can then check our Google Sheet to confirm this has worked.

Once you are happy you can name your Zap by clicking the pencil icon next to the default title (Untitled Zap) and then click publish.
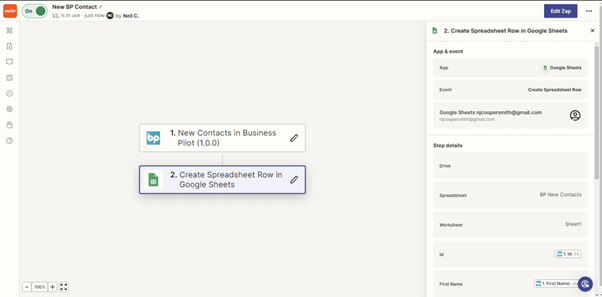
Now you should see that the Zap has been turned ‘on’ in the top left of the screen.
Moving forward, every time a New Contact is created in Business Pilot, a new row will be created in your Google Spreadsheet.
Amend your Zap at any time, by clicking ‘Edit Zap’ or return to your Zap list by clicking on the Zapier logo in the top corner.
Once your Business Pilot system is connected to Zapier, you can set up as many Zaps as you would like using the available triggers and actions. Please let us know what Zaps you’ve set-up and how they are working for you. And if you have any ideas for additional triggers and actions to be set-up, let us know so that we can add them to our development schedule.