This process will guide you through integrating the Business Pilot web forms with your website.
- To start us off go to your web browser and navigate to the login page
- Login to Business Pilot using your email address and password.
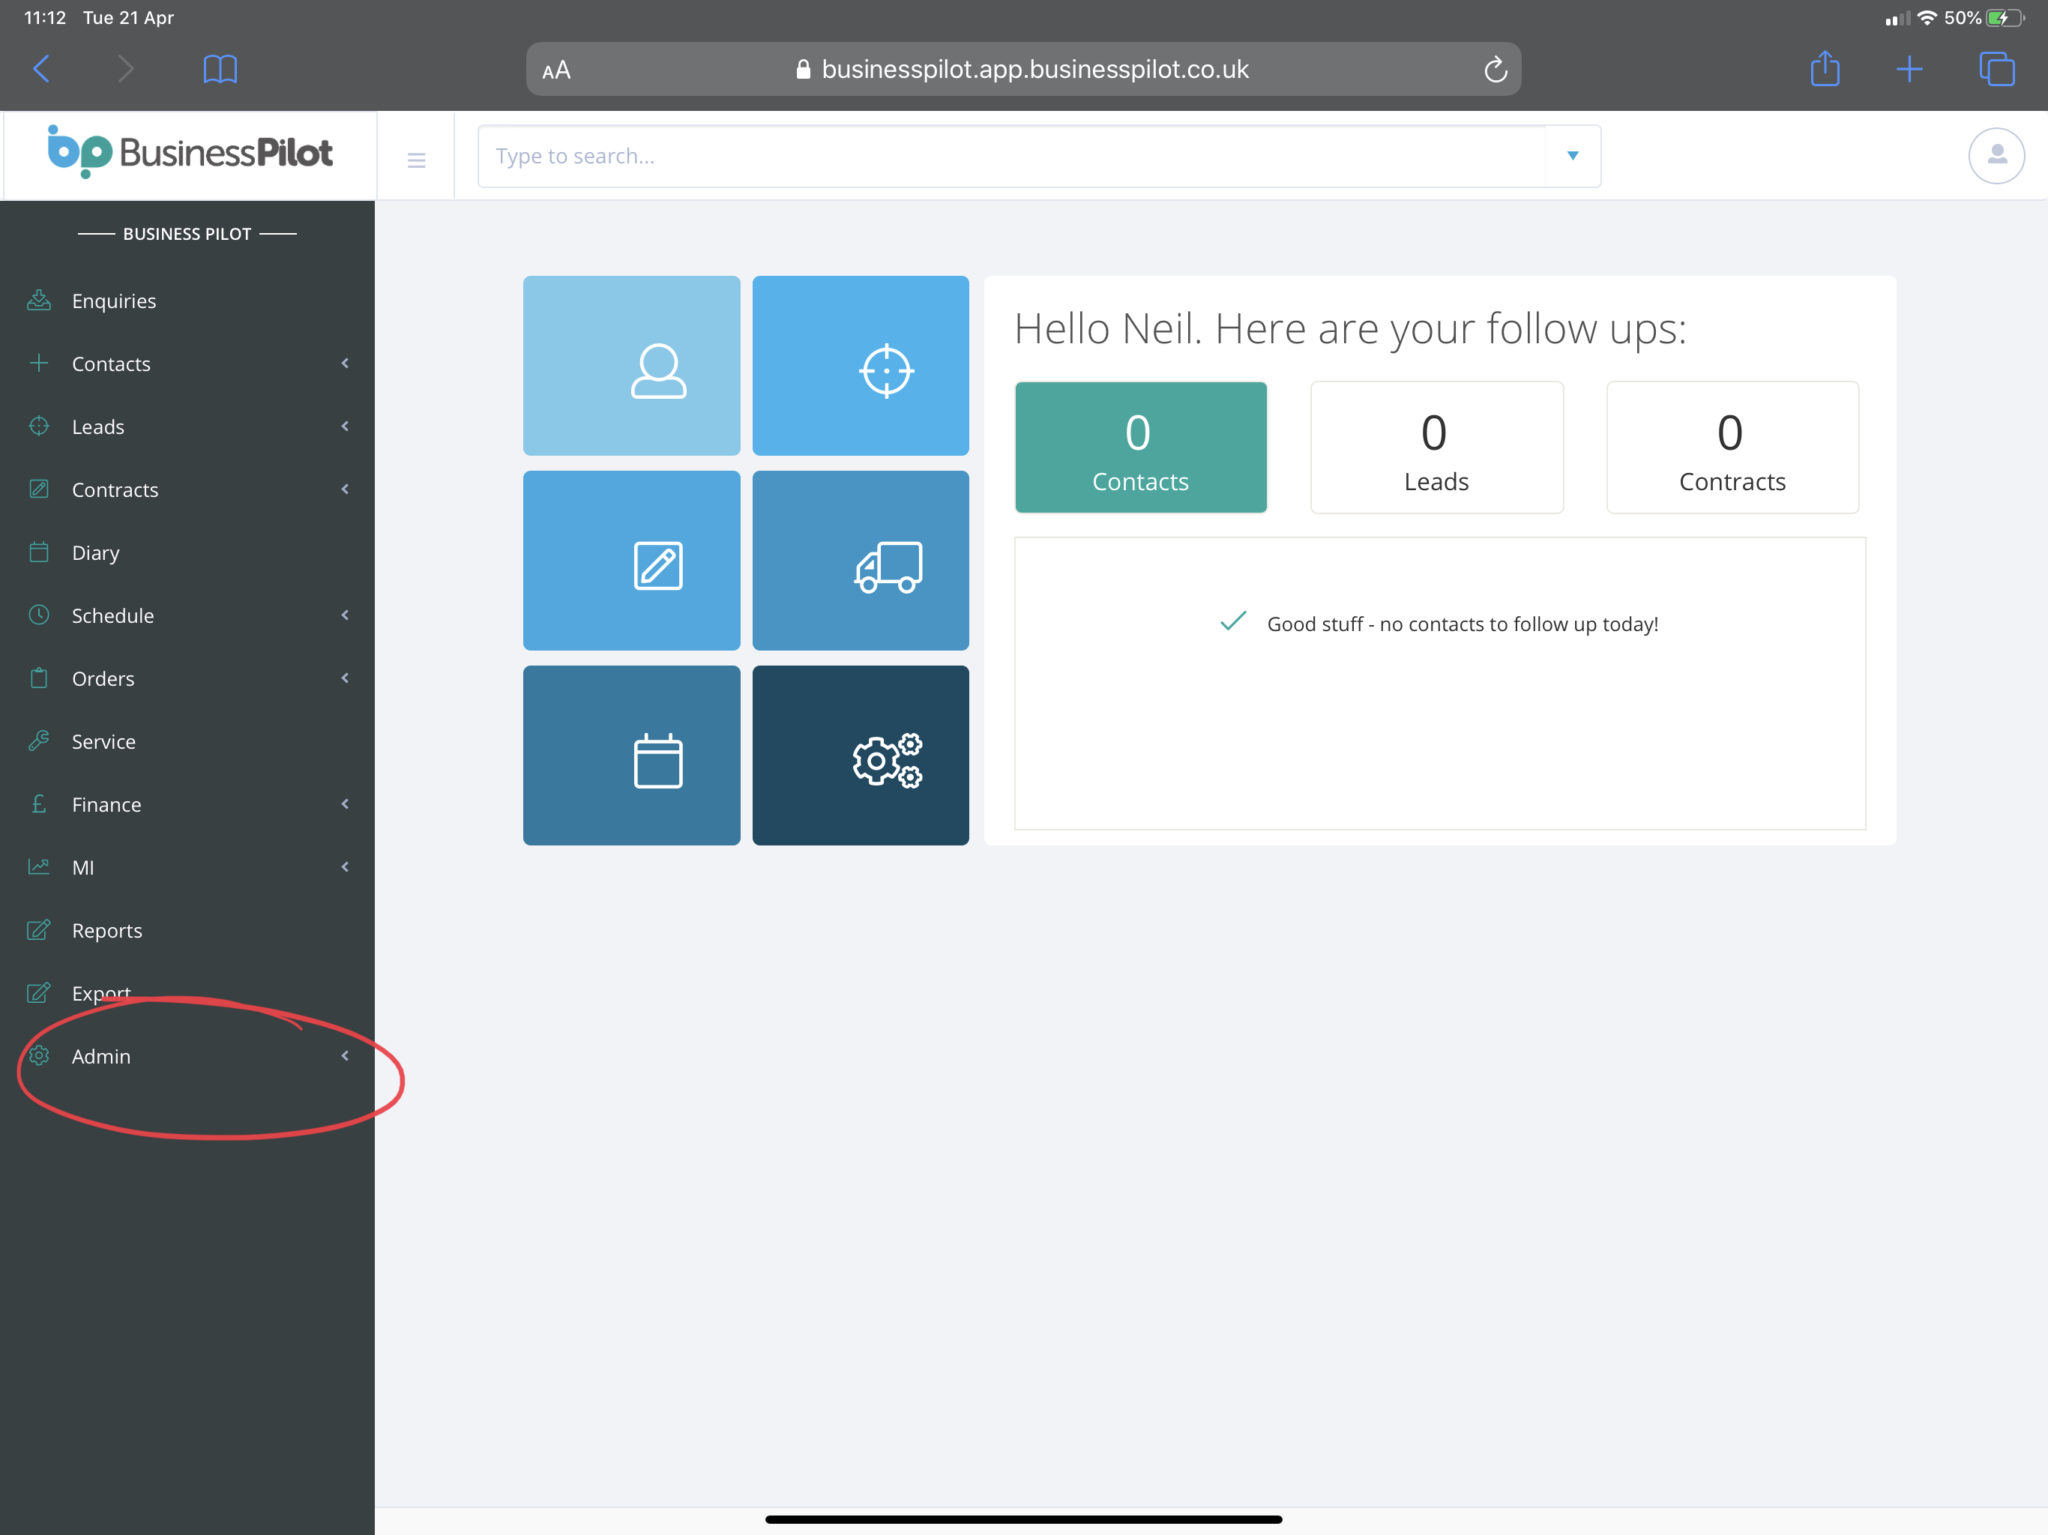
- Now go to the menu by clicking the 3 grey lines next to your logo in the top left
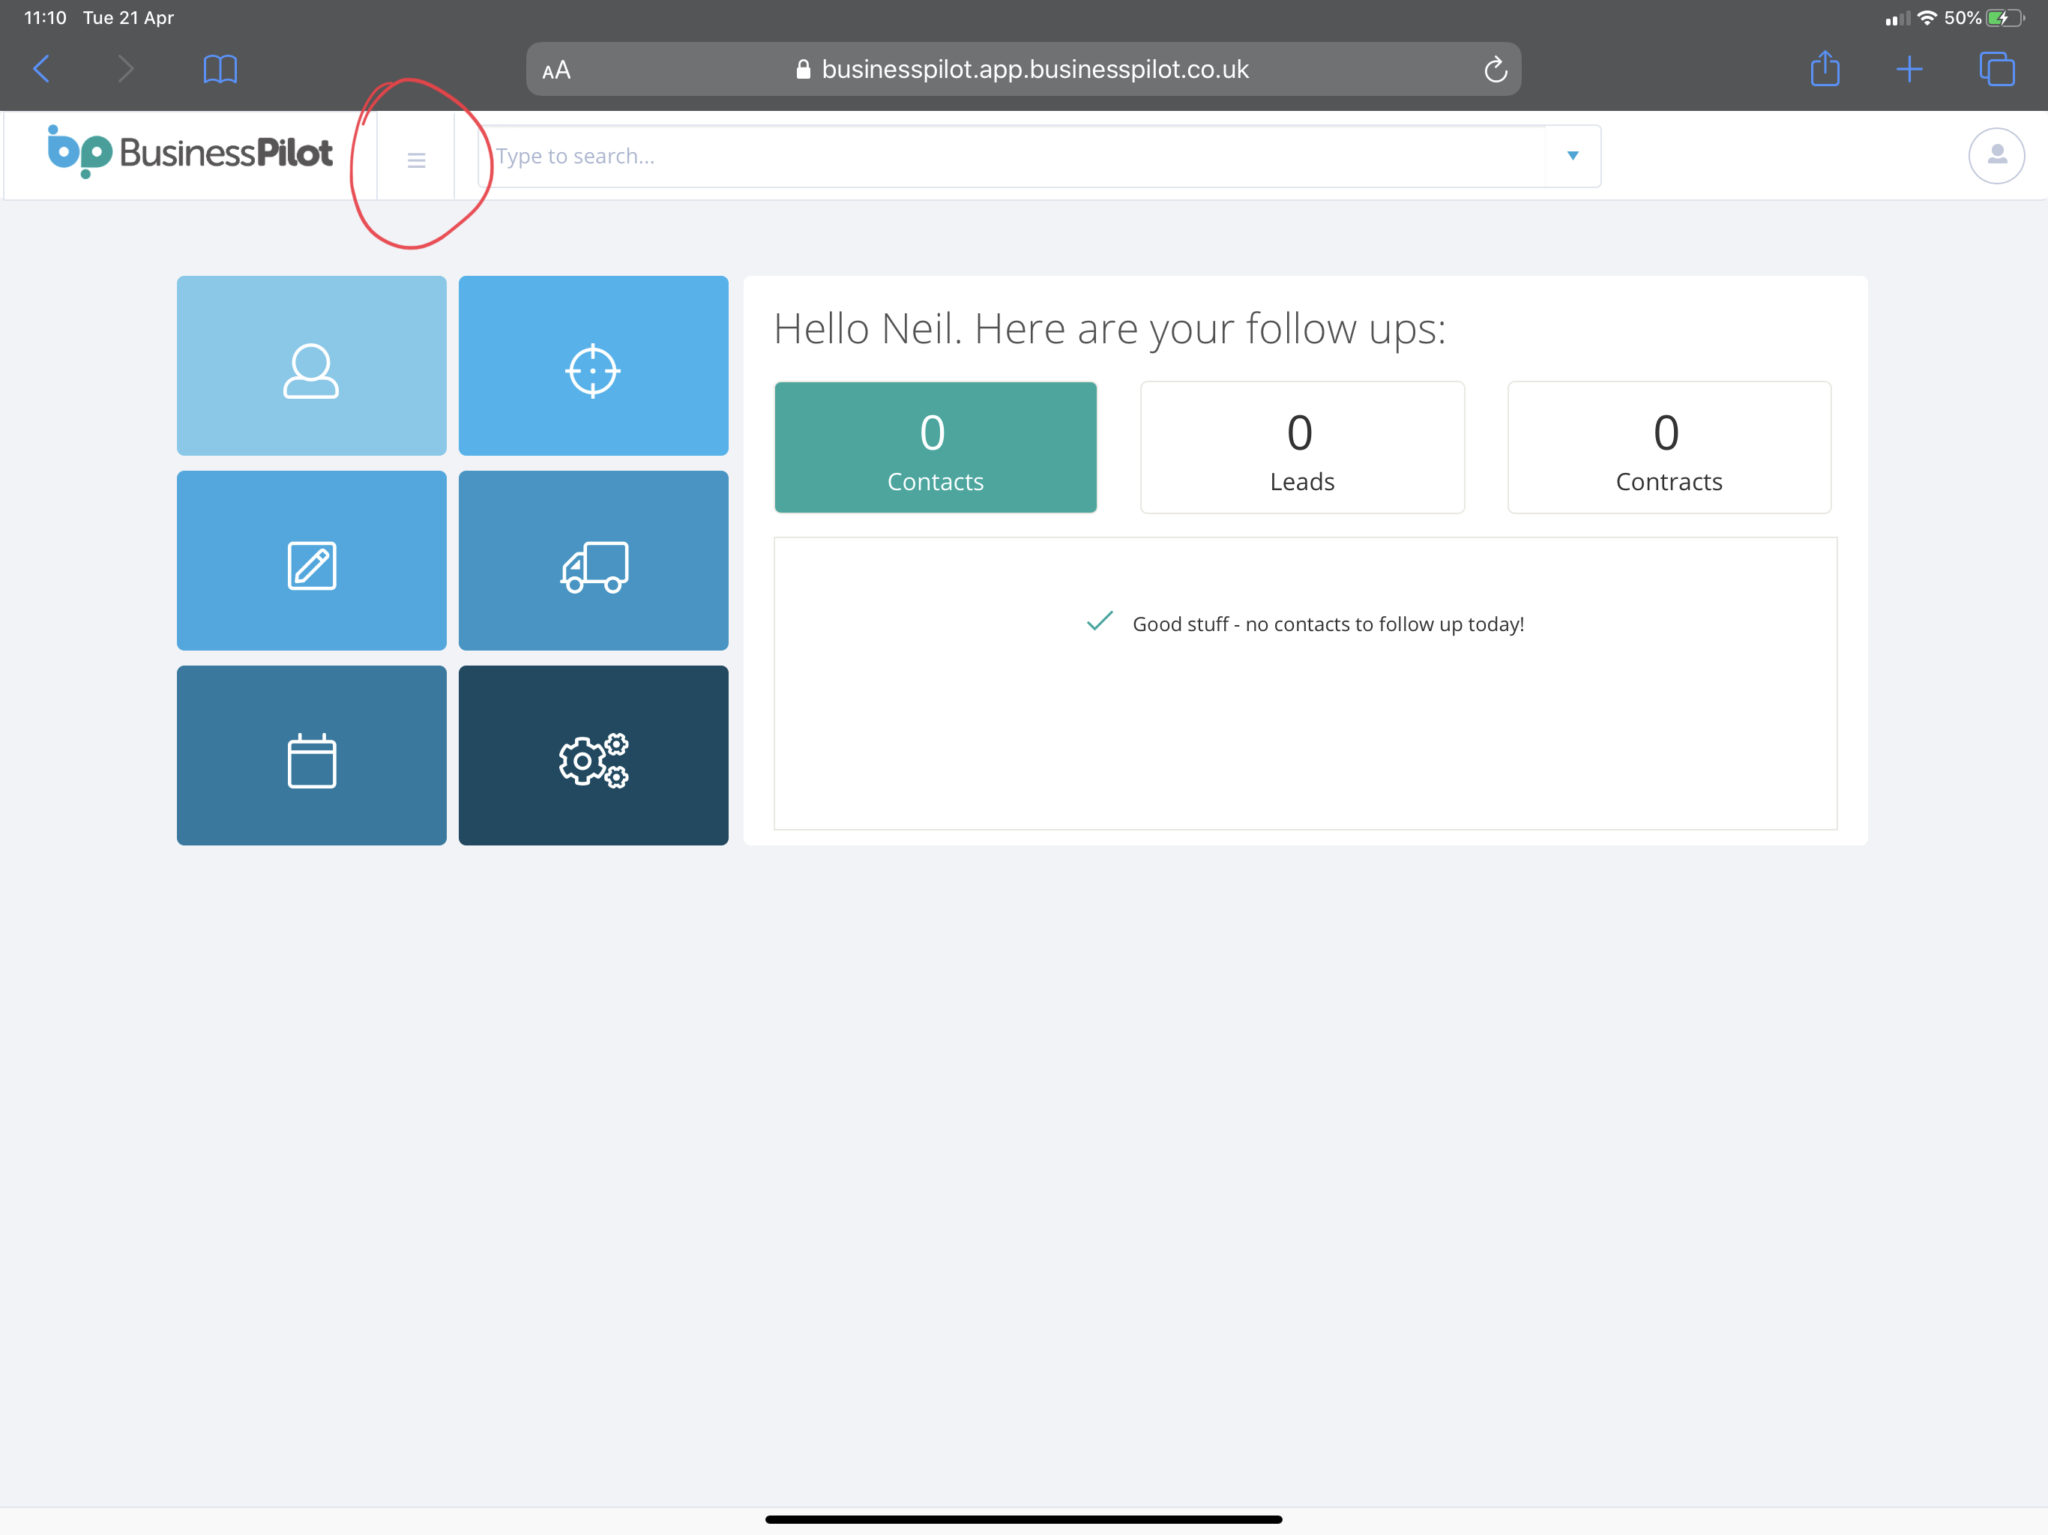
- Click on the ‘Admin’ dropdown at the bottom of the menu

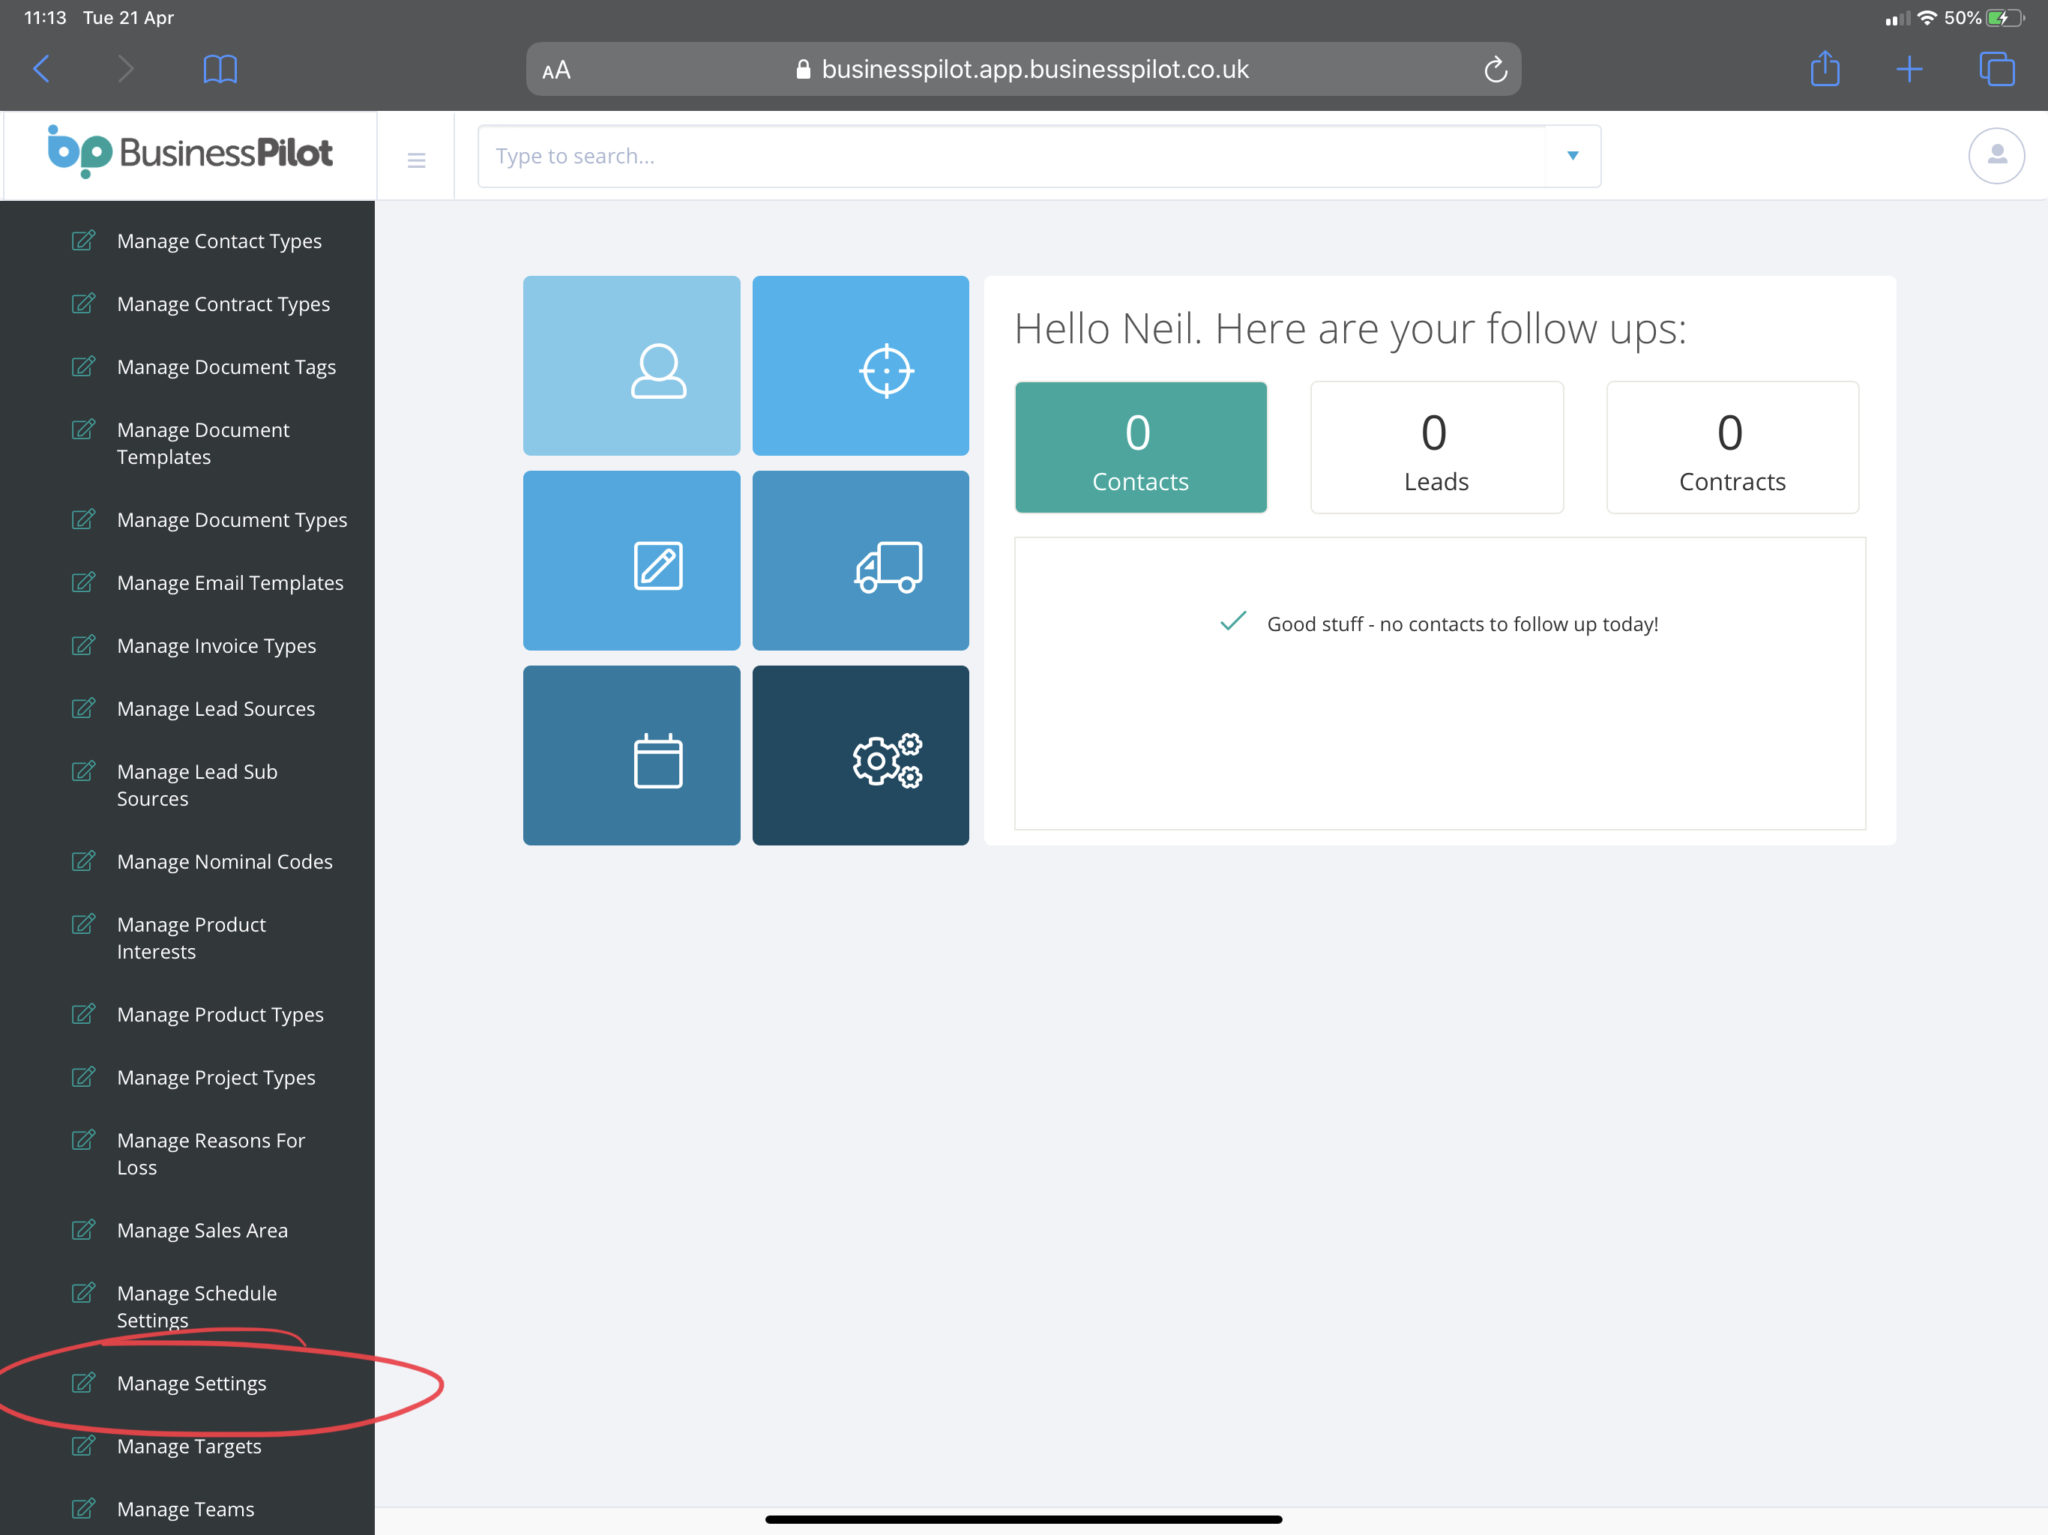
- Scroll down in that menu until you see ‘Manage Settings’.
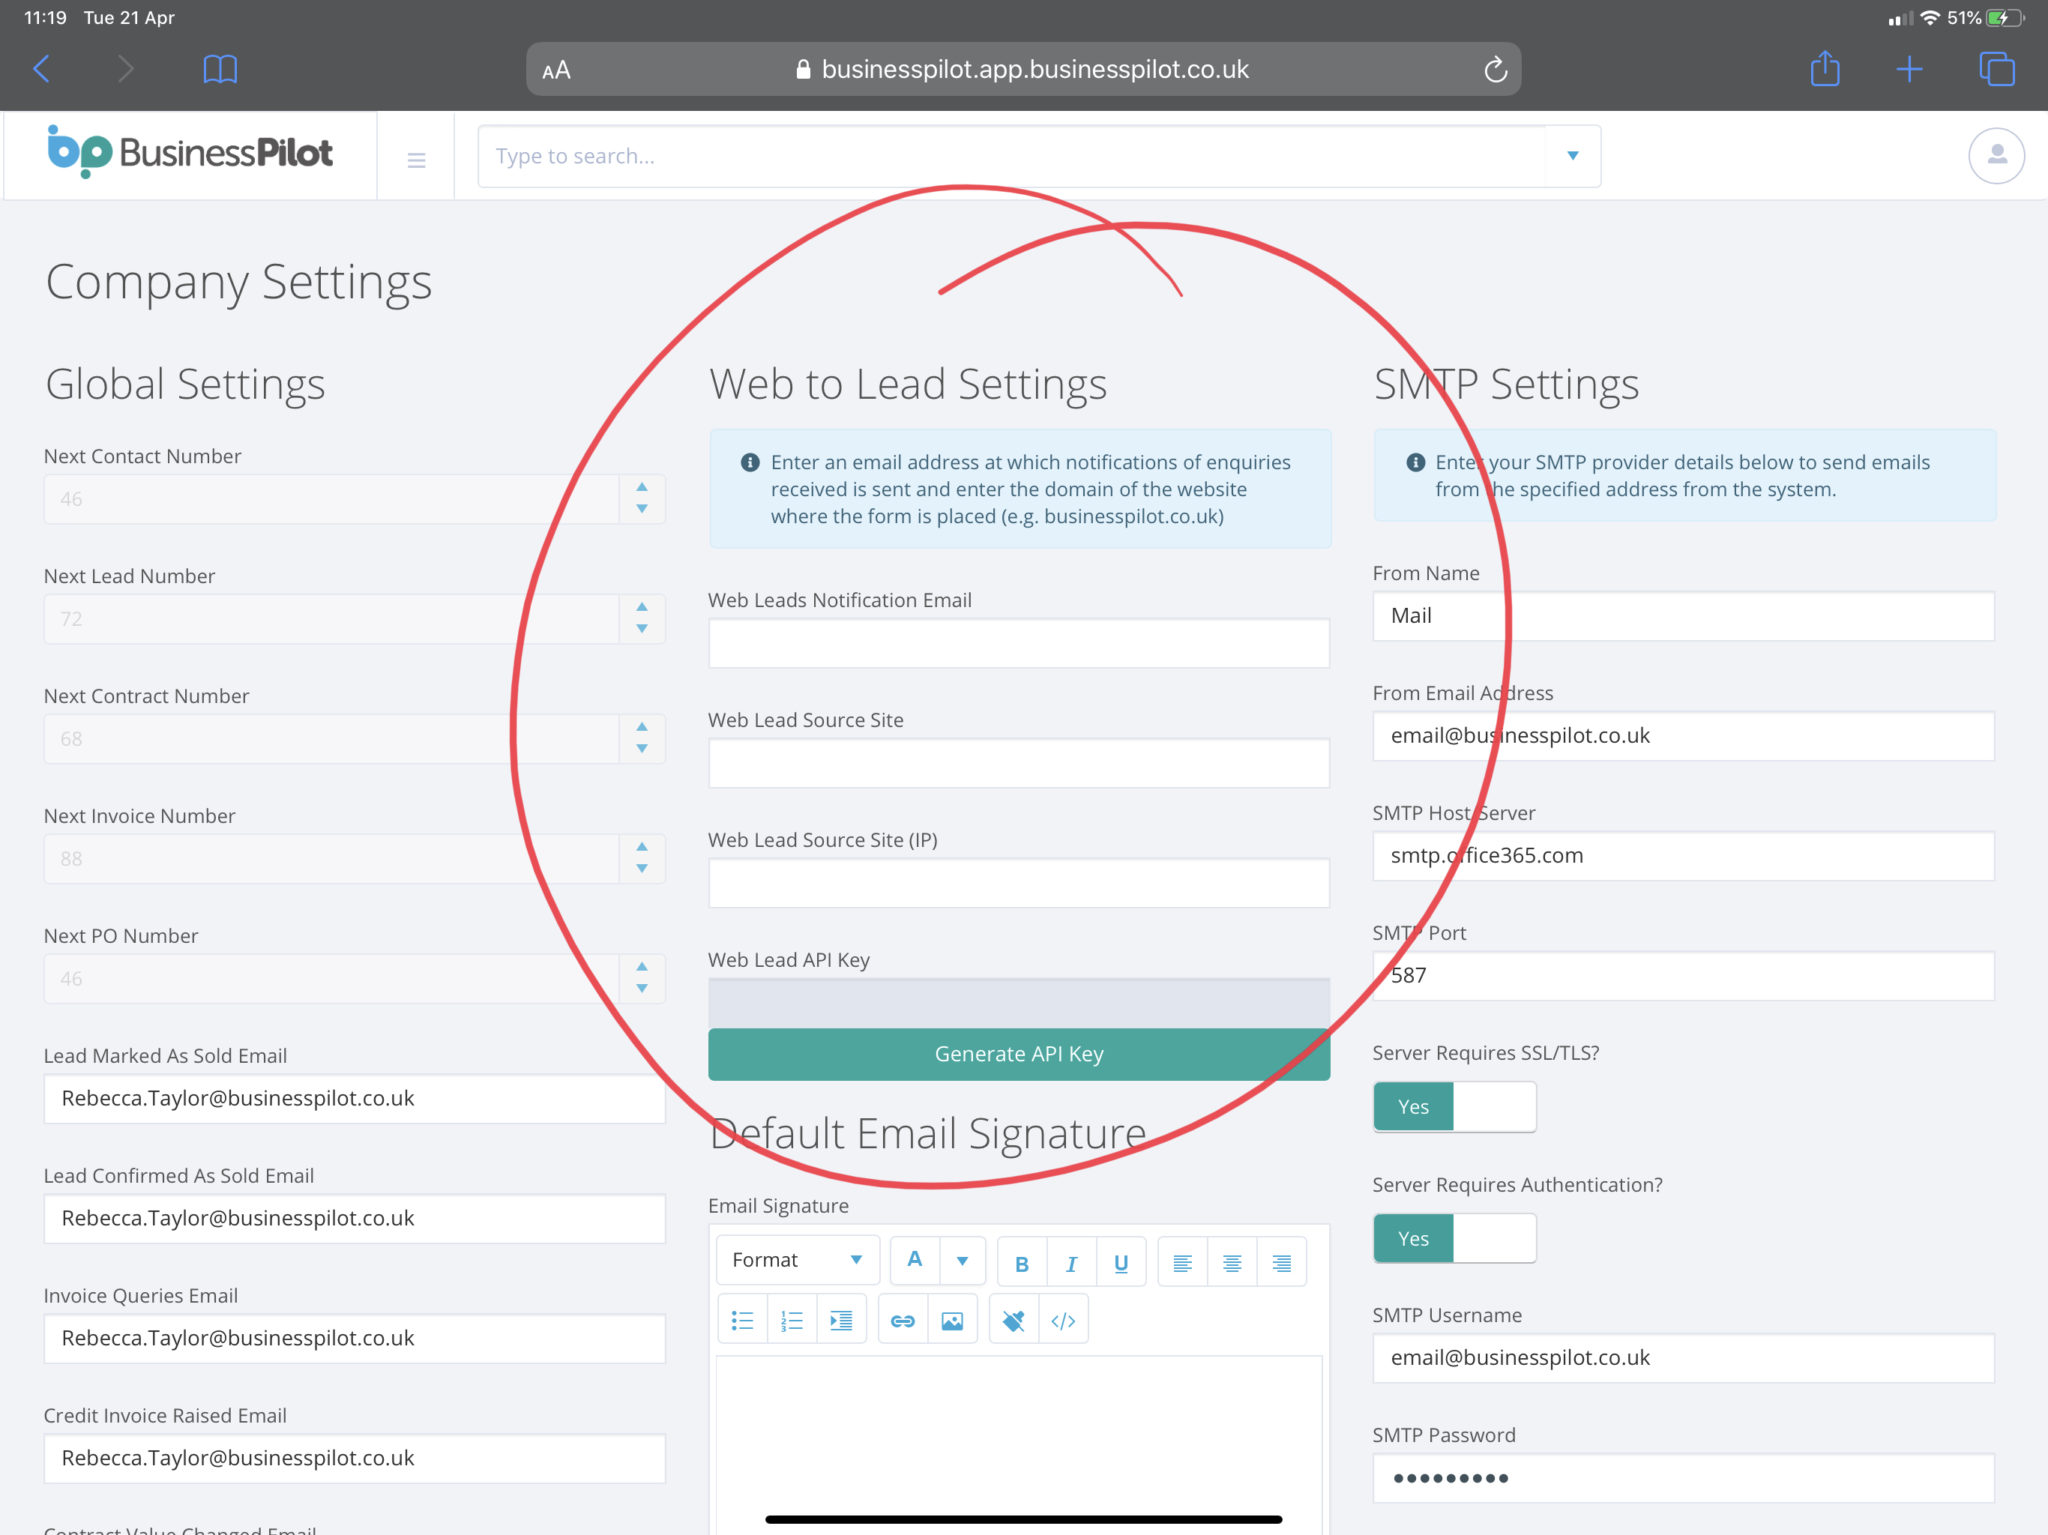
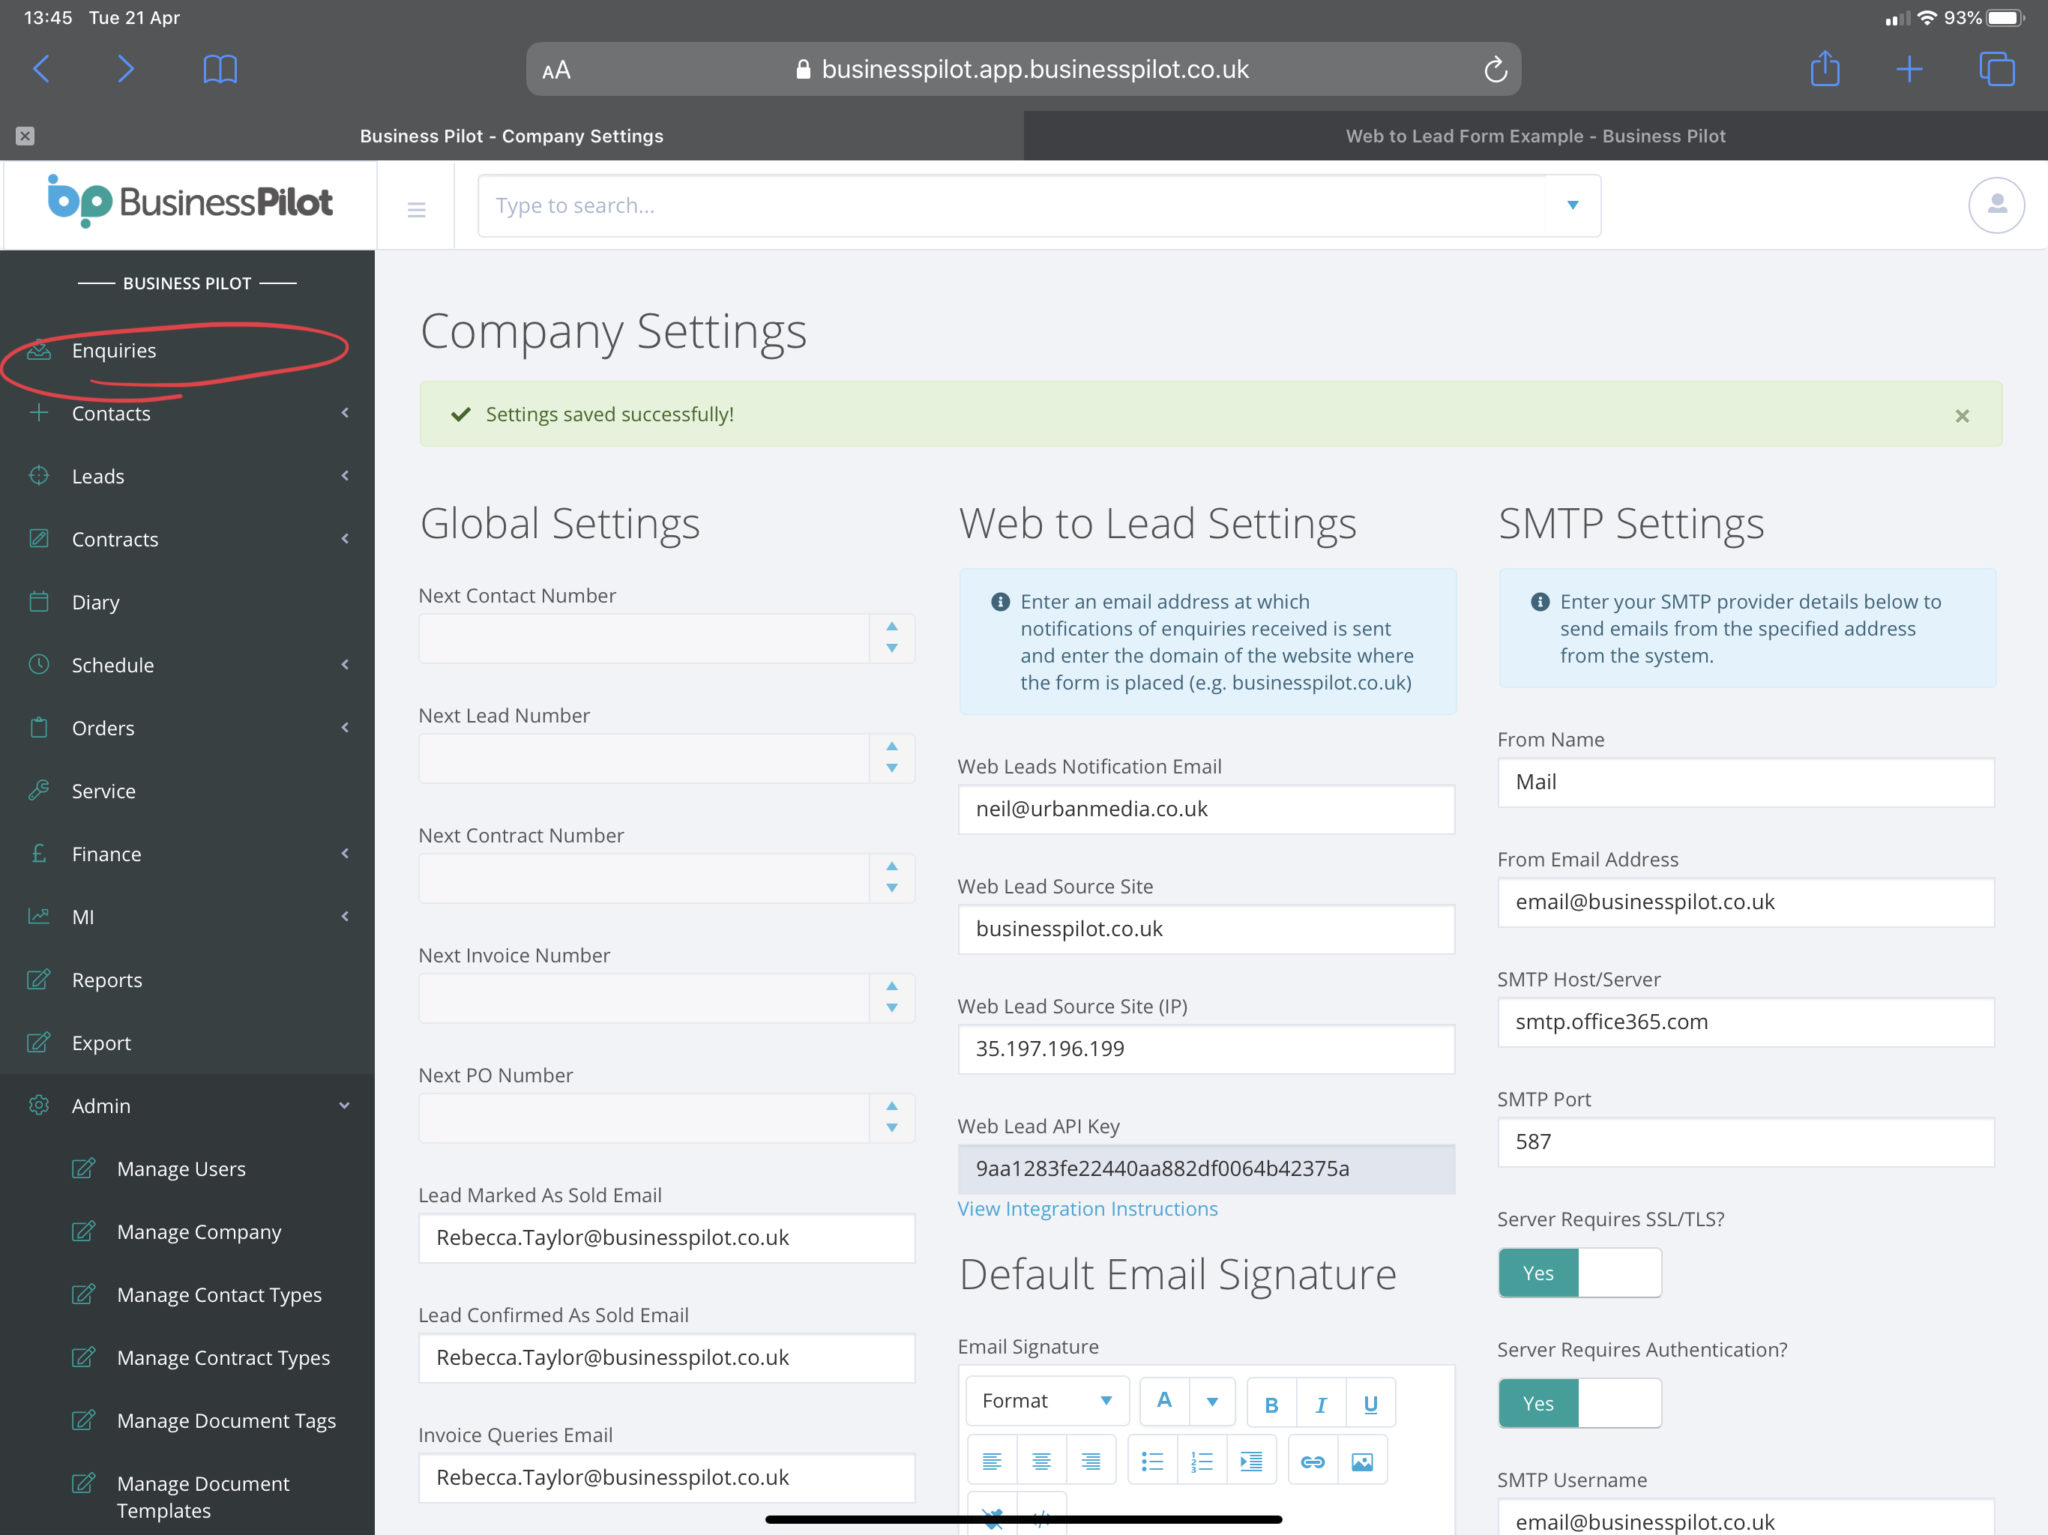
- In the middle column of the ‘Manage Settings’ screen you are interested in the ‘Web to Lead Settings’.
Here is an explanation of each field, please complete in this order:- First, fill in the ‘Web Leads Notification Email’. This email address will receive a notification when someone submits your form.
- In ‘Web Lead Source Site’ enter the domain of the website that your form will be placed on e.g. windowssurrey.com
- We sometimes need a backup to just your domain and therefore in ‘Web Lead Source Site (IP)’ please enter the IP address of your website, this will look something like: 35.197.196.199
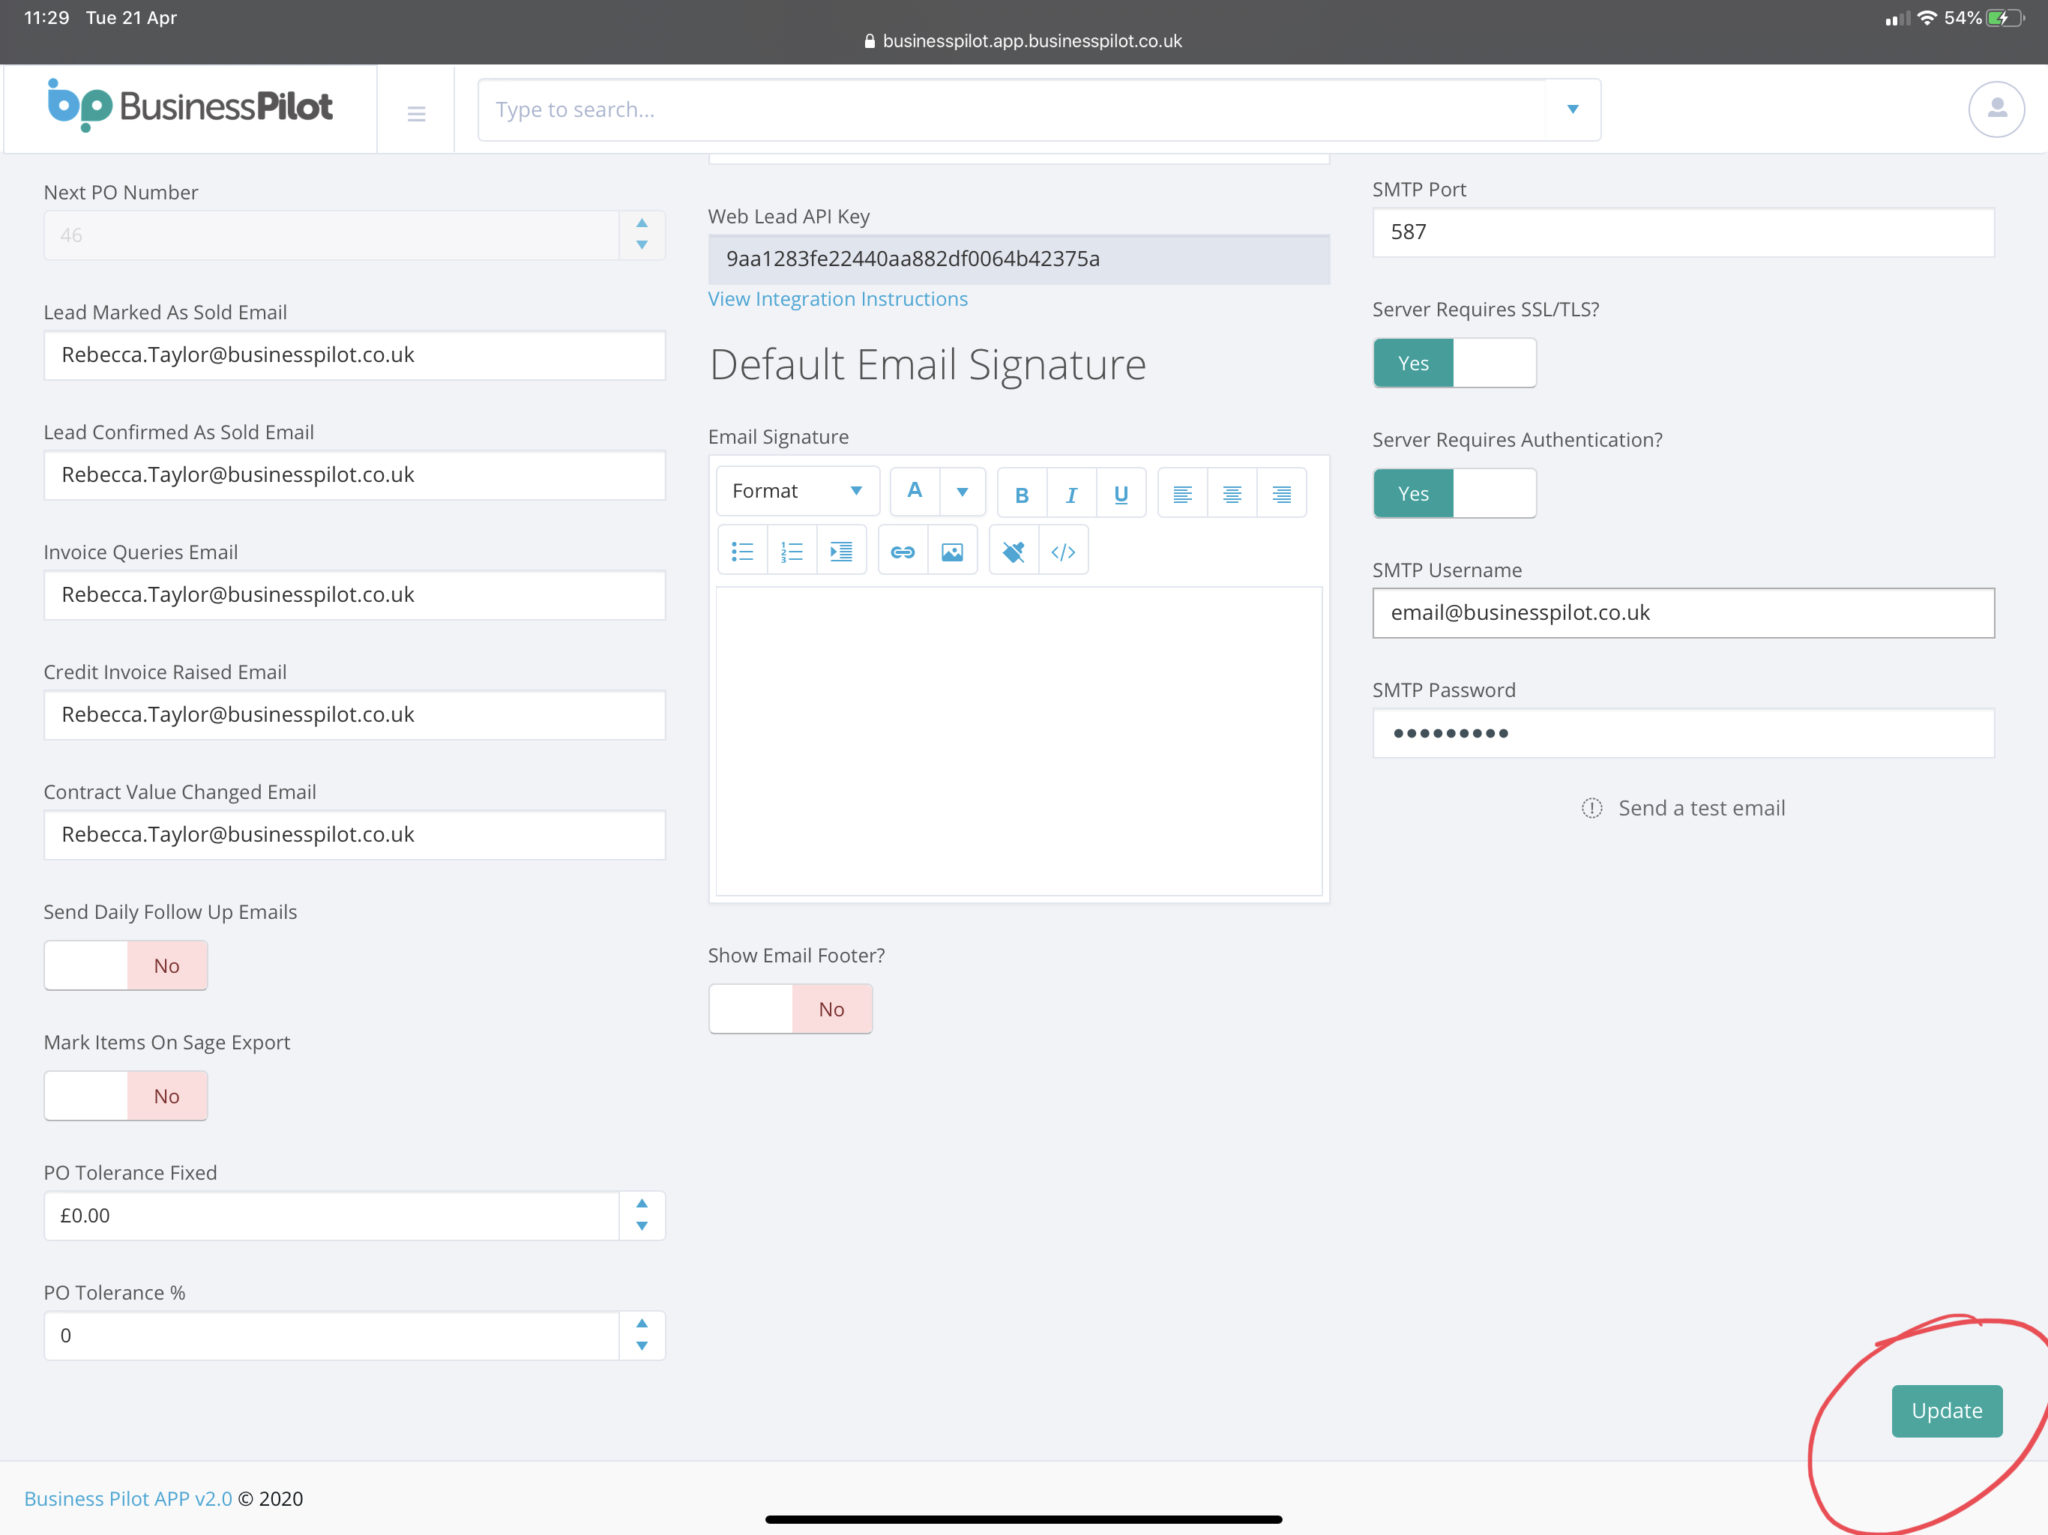
- Then click the green ‘Generate API Key’ button. This will fill the grey area above the button with your API key.
- Scroll to the bottom of the page and click the ‘Update’ button.
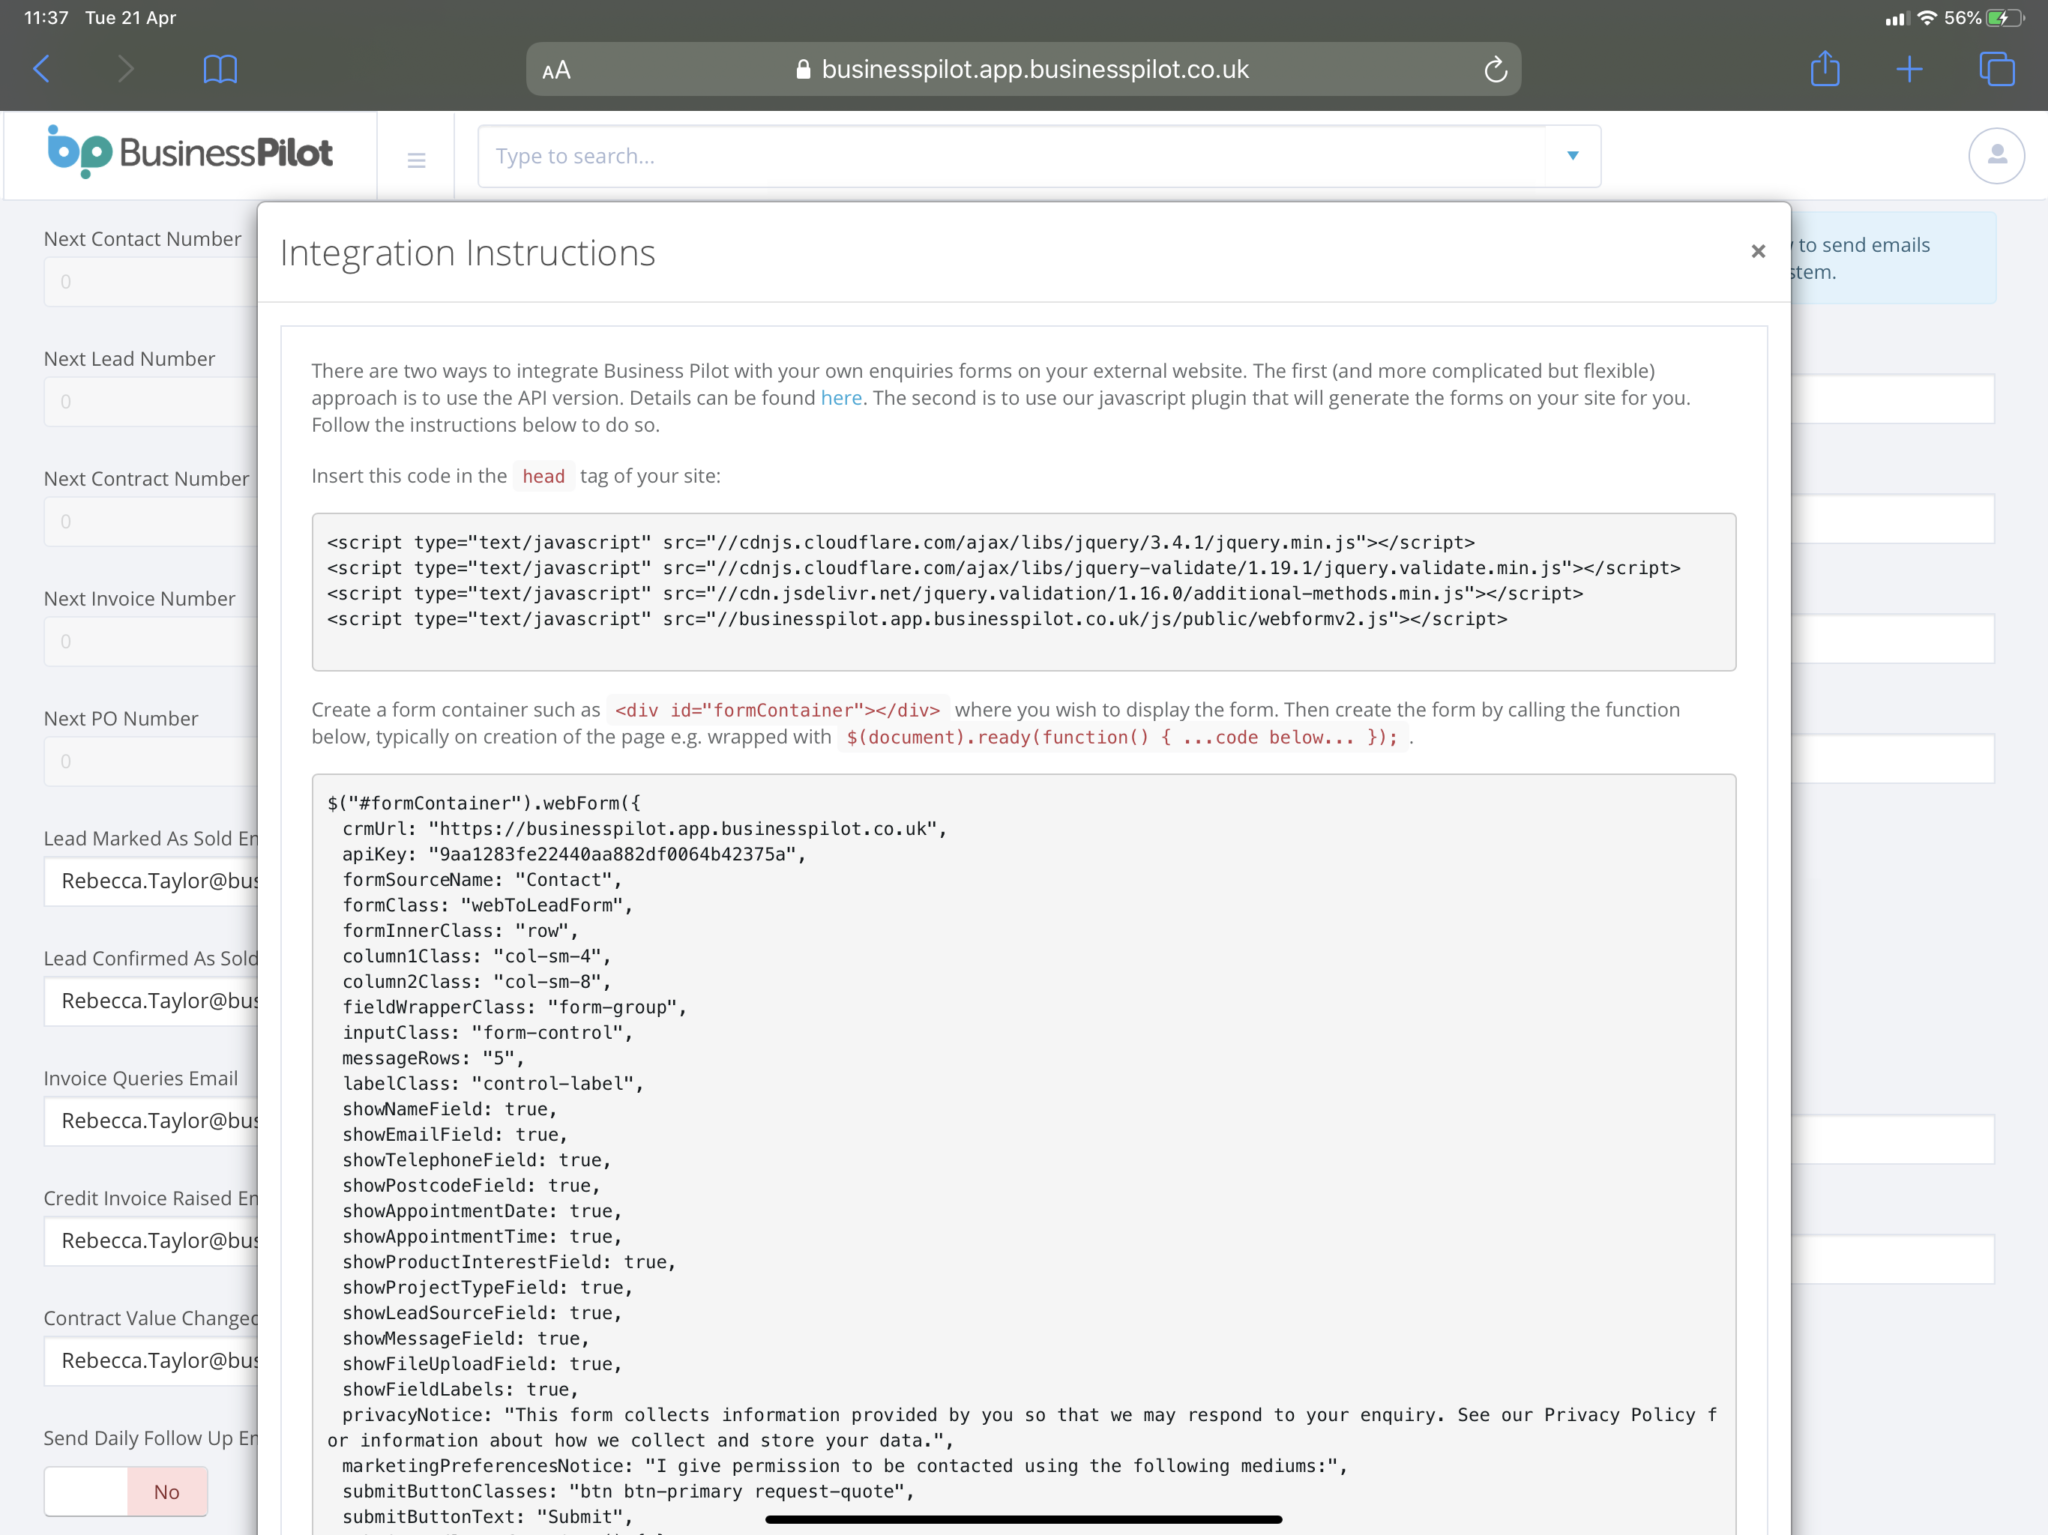
- Now scroll back up the page and click on ‘View Integration Instructions’ below the ‘Web Lead API Key’ field.
- You will now see a few pieces of code that we will use to integrate the form with your website.
- In the first grey box there are 4 scripts that you will need to add just before the closing
</head>tag of your website.NOTE: You may not need to include the first line highlighted in red below. Your website may already have jQuery included e.g. if you have a WordPress website it is included as default. Please ask a developer if you are unsure.
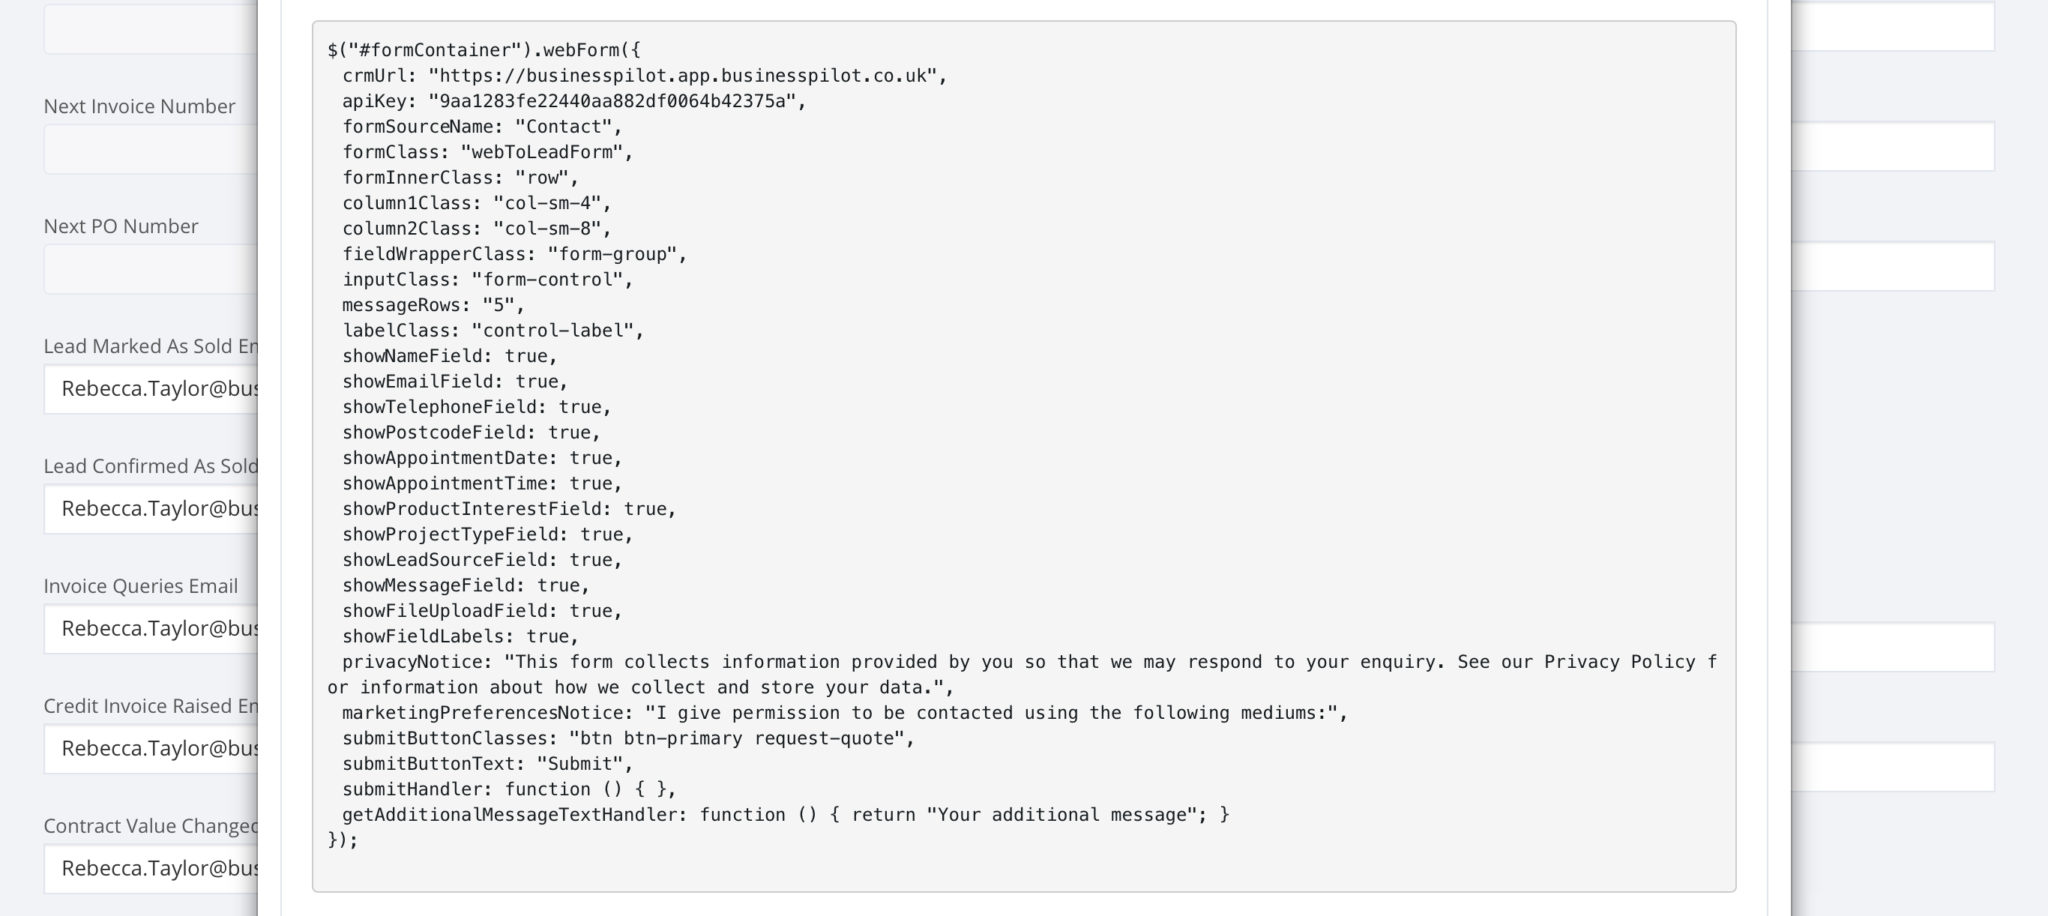
- In the second grey box we have the code that calls your form and tells it how to work. We are going to put this into a Javascript file on your website.

Typically, you will want to wrap this piece of code like below:$(document).ready(function() { YOUR CODE HERE });If you have a WordPress website, you may need to wrap it like this:
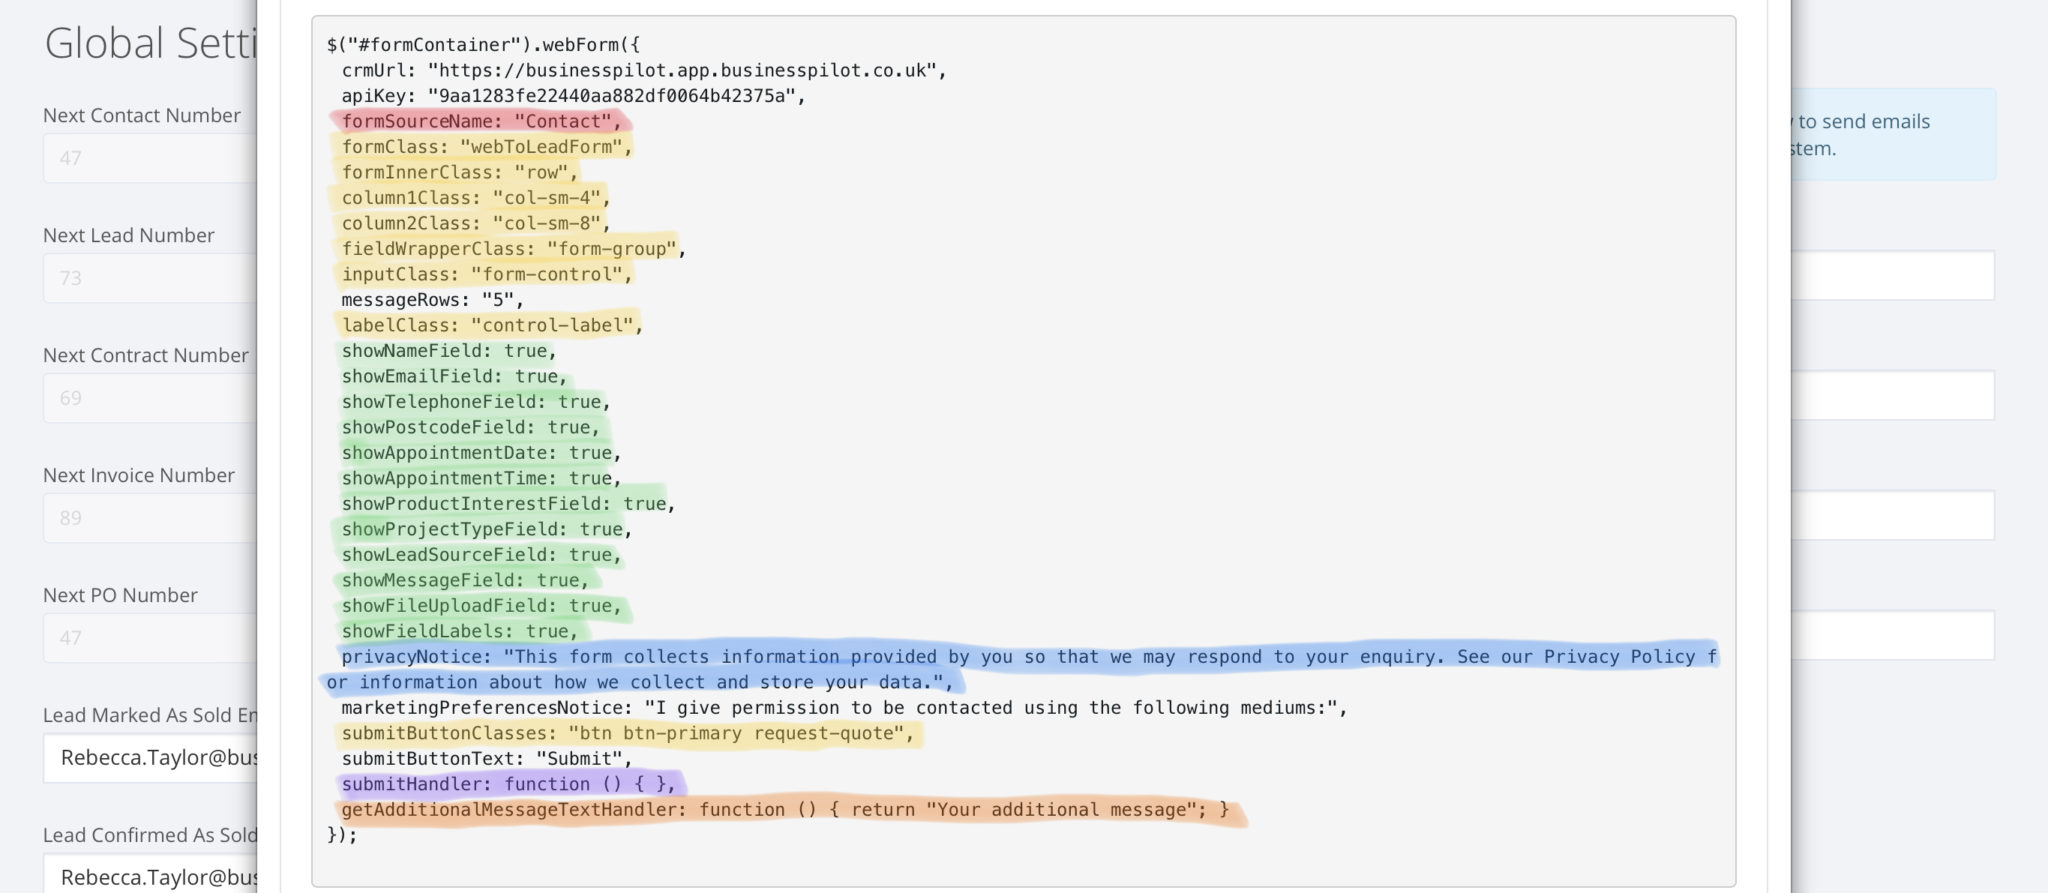
jQuery(document).ready(function($) { YOUR CODE HERE }); - You can customise some of the options within this code. Below we explain some of the things that you can do:

- Highlighted in red is ‘formSourceName’, whatever you put in here will act as an identifier for which form your enquiries came from.
- Highlighted in yellow is a series of ‘Class’ fields. You can change these classes to tie the form in with your existing forms. These classes will be used to style different parts of the form.
- Highlighted in green is a series of true or false field options. You can choose whether you want these fields to be displayed in the form. By default everything is set to ‘true’ and therefore visible on the form. If you’d like to hide a field, set it to ‘false’.
- Highlighted in blue is a way you can personalise the privacy notice on the form. If you do not need a privacy notice then leave this blank.
- Highlighted in purple is a field where you can add code that tells the form what to do after a user has pressed submit e.g. you could use the below code to redirect the form to a thank you page:
window.location.href="/example-thank-you.html"
If you leave this field blank the enquiry will still go into your Business Pilot system but the form will not do anything when a user submits it.
- Highlighted in orange is ‘getAdditionalMessageTextHandler’. If you have additional fields that you would like to capture that aren’t present with this form, then you can manually add these to your form. When you submit the form inside of the ‘getAdditionalMessageTextHandler’ function you can retrieve the values of those fields that the user has entered. This will append whatever text output/values you retrieve from the fields to the message field (normally where the user types any details of their enquiry). This message with the appended text/values will appear inside the enquiry received within the CRM for your reference.
- If you already have a Javascript file then you can add this code to that file. If not then you will want to create a Javascript file, maybe called ‘WebLeadForm.js’ (without the single quotes) and reference it just before the end
</head>tag using a script tag like:<script type="text/javascript" src="YOURPATHHERE/WebLeadForm.js"></script>
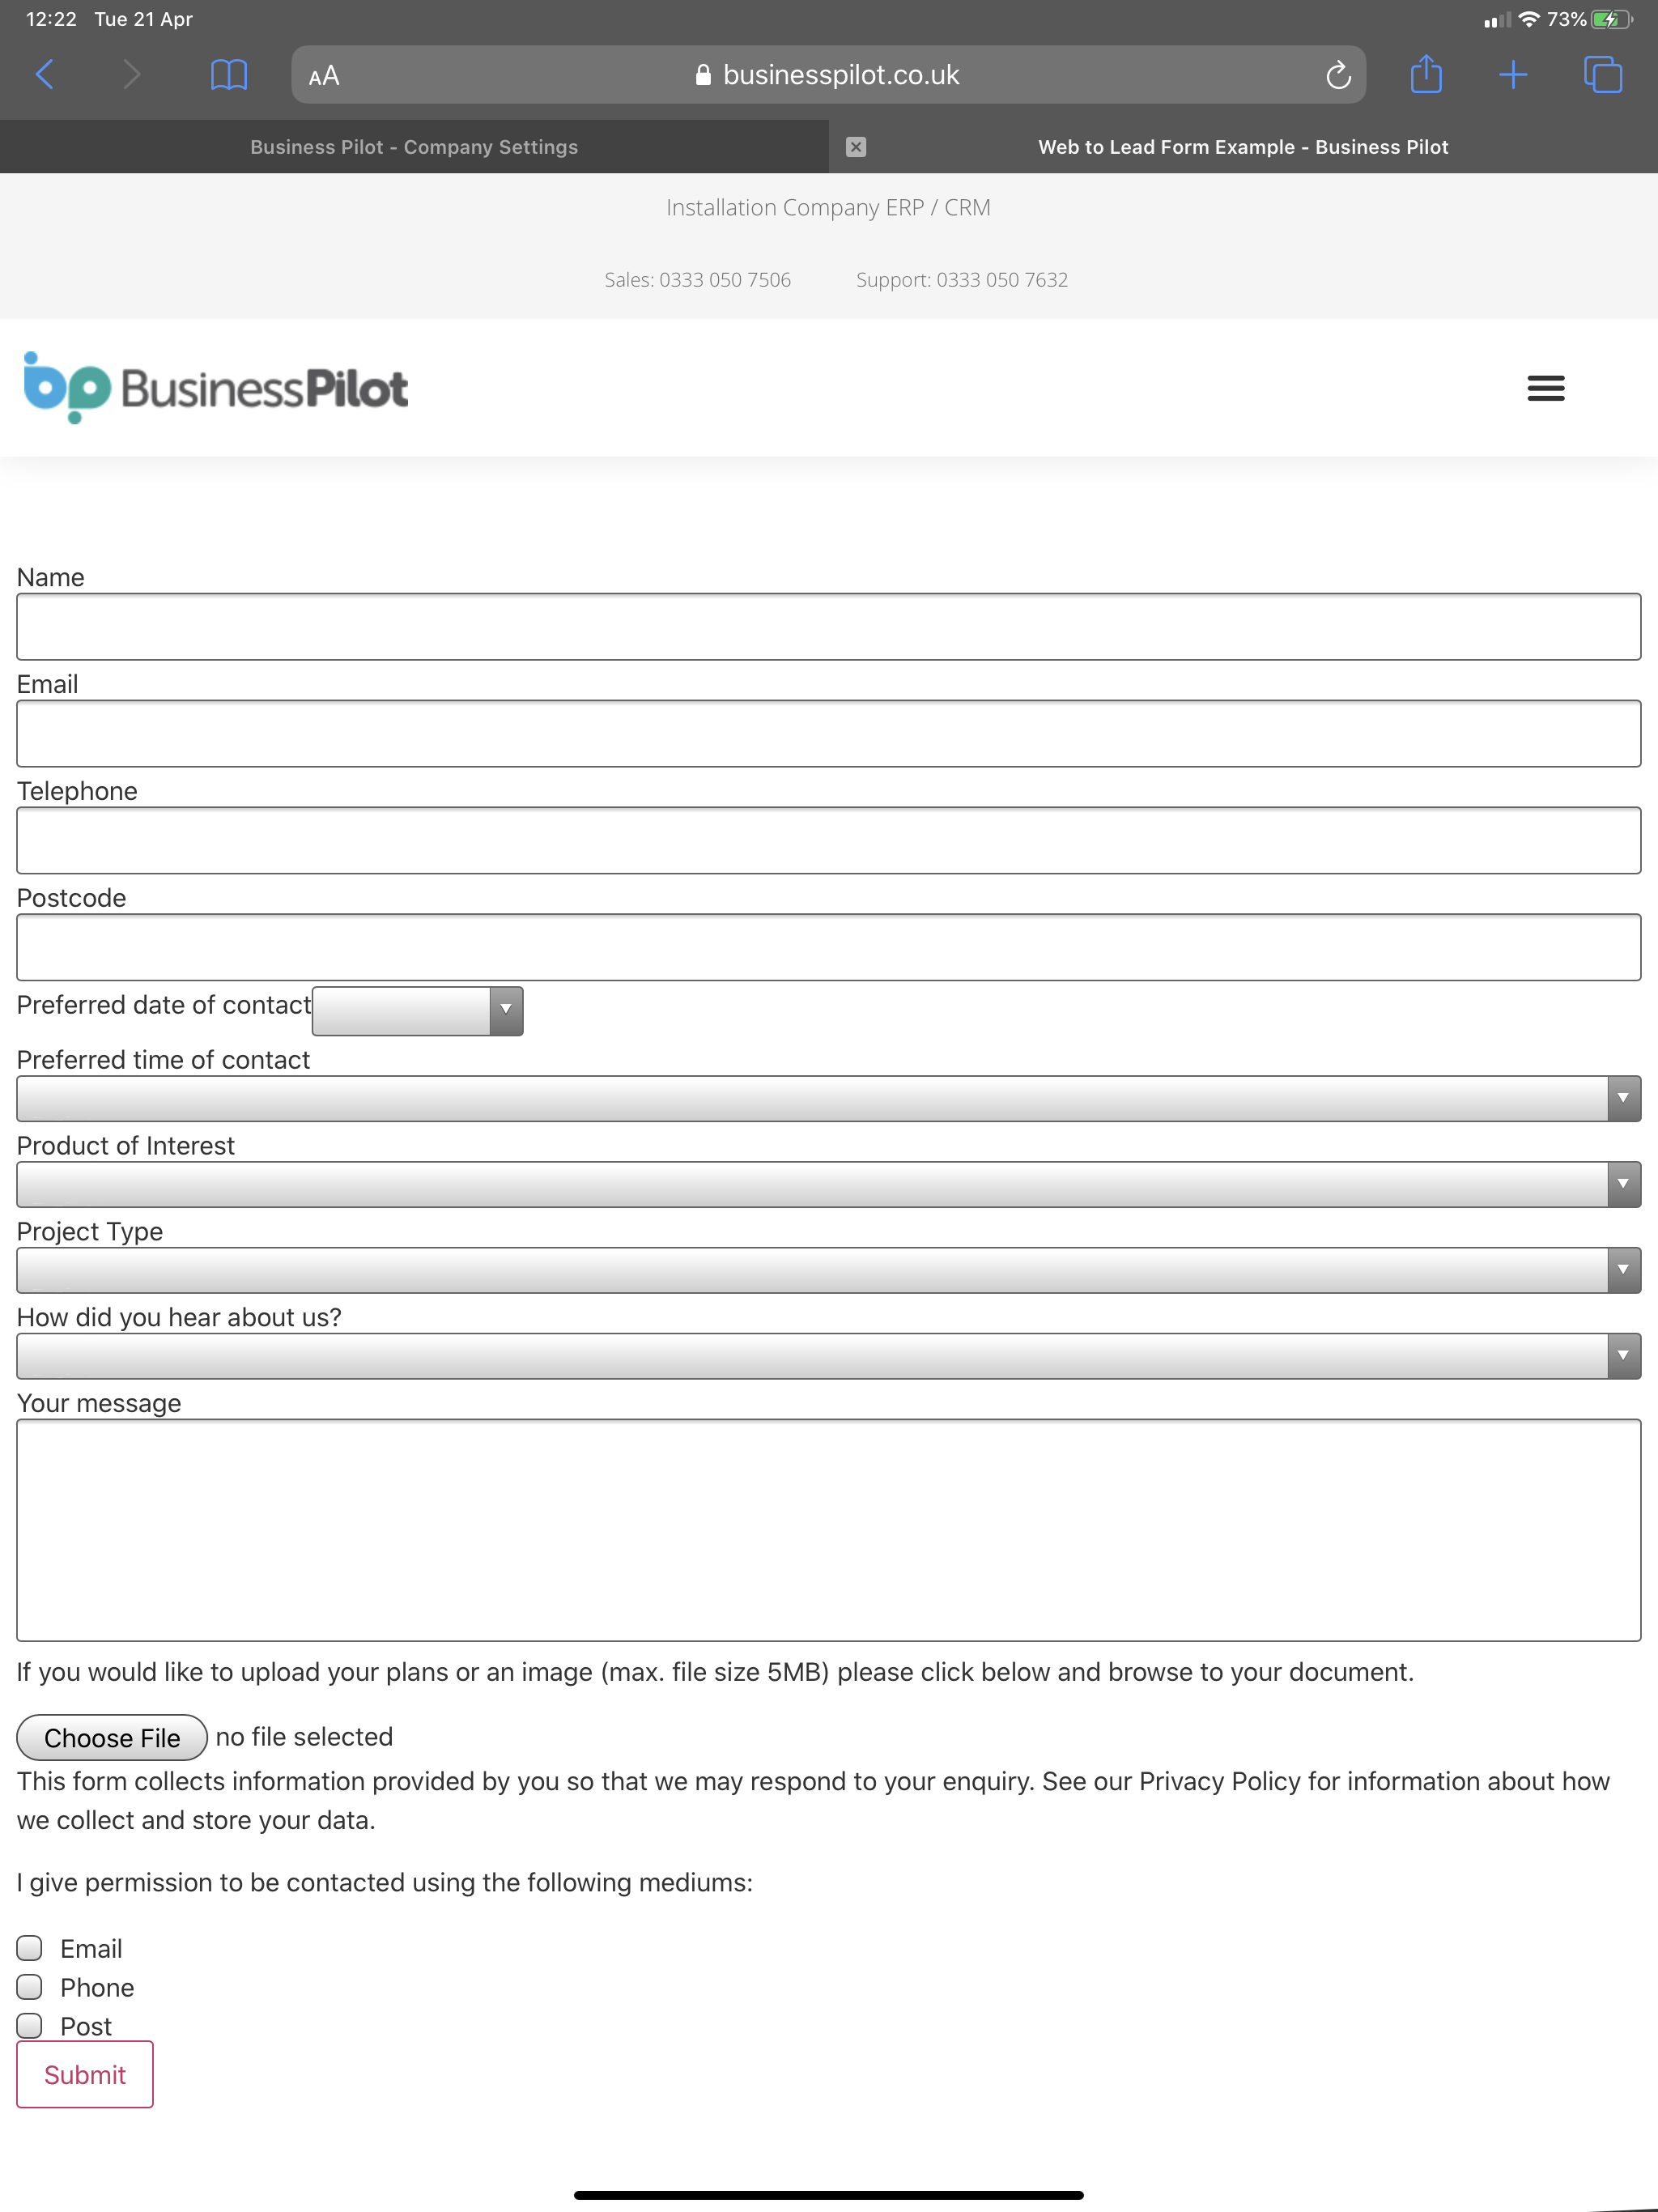
Remember to change YOURPATHHERE to match the folder structure of your Javascript file. - We are now going to want to add a piece of code on your website where you would like the form to display. The code we will need to add is:
<div id="formContainer"></div>
This can either go onto a page by itself or into a specific section of one of your existing pages.
- If you now navigate to the page that you just placed this on, you should see the form. Something that looks similar to:

- You can style this form to make it look different by using CSS code. If you are unsure on what this is, your website developer will be able to help. An example of a Business Pilot user who has styled their form can be found here.
- It is always a good idea to test your form, so go ahead and fill in some dummy information and click the ‘Submit’ button. If you left the ‘submitHandler’ field blank in Step 11 then the ‘Submit’ button will briefly say ‘Please wait’ before returning to say ‘Submit’.
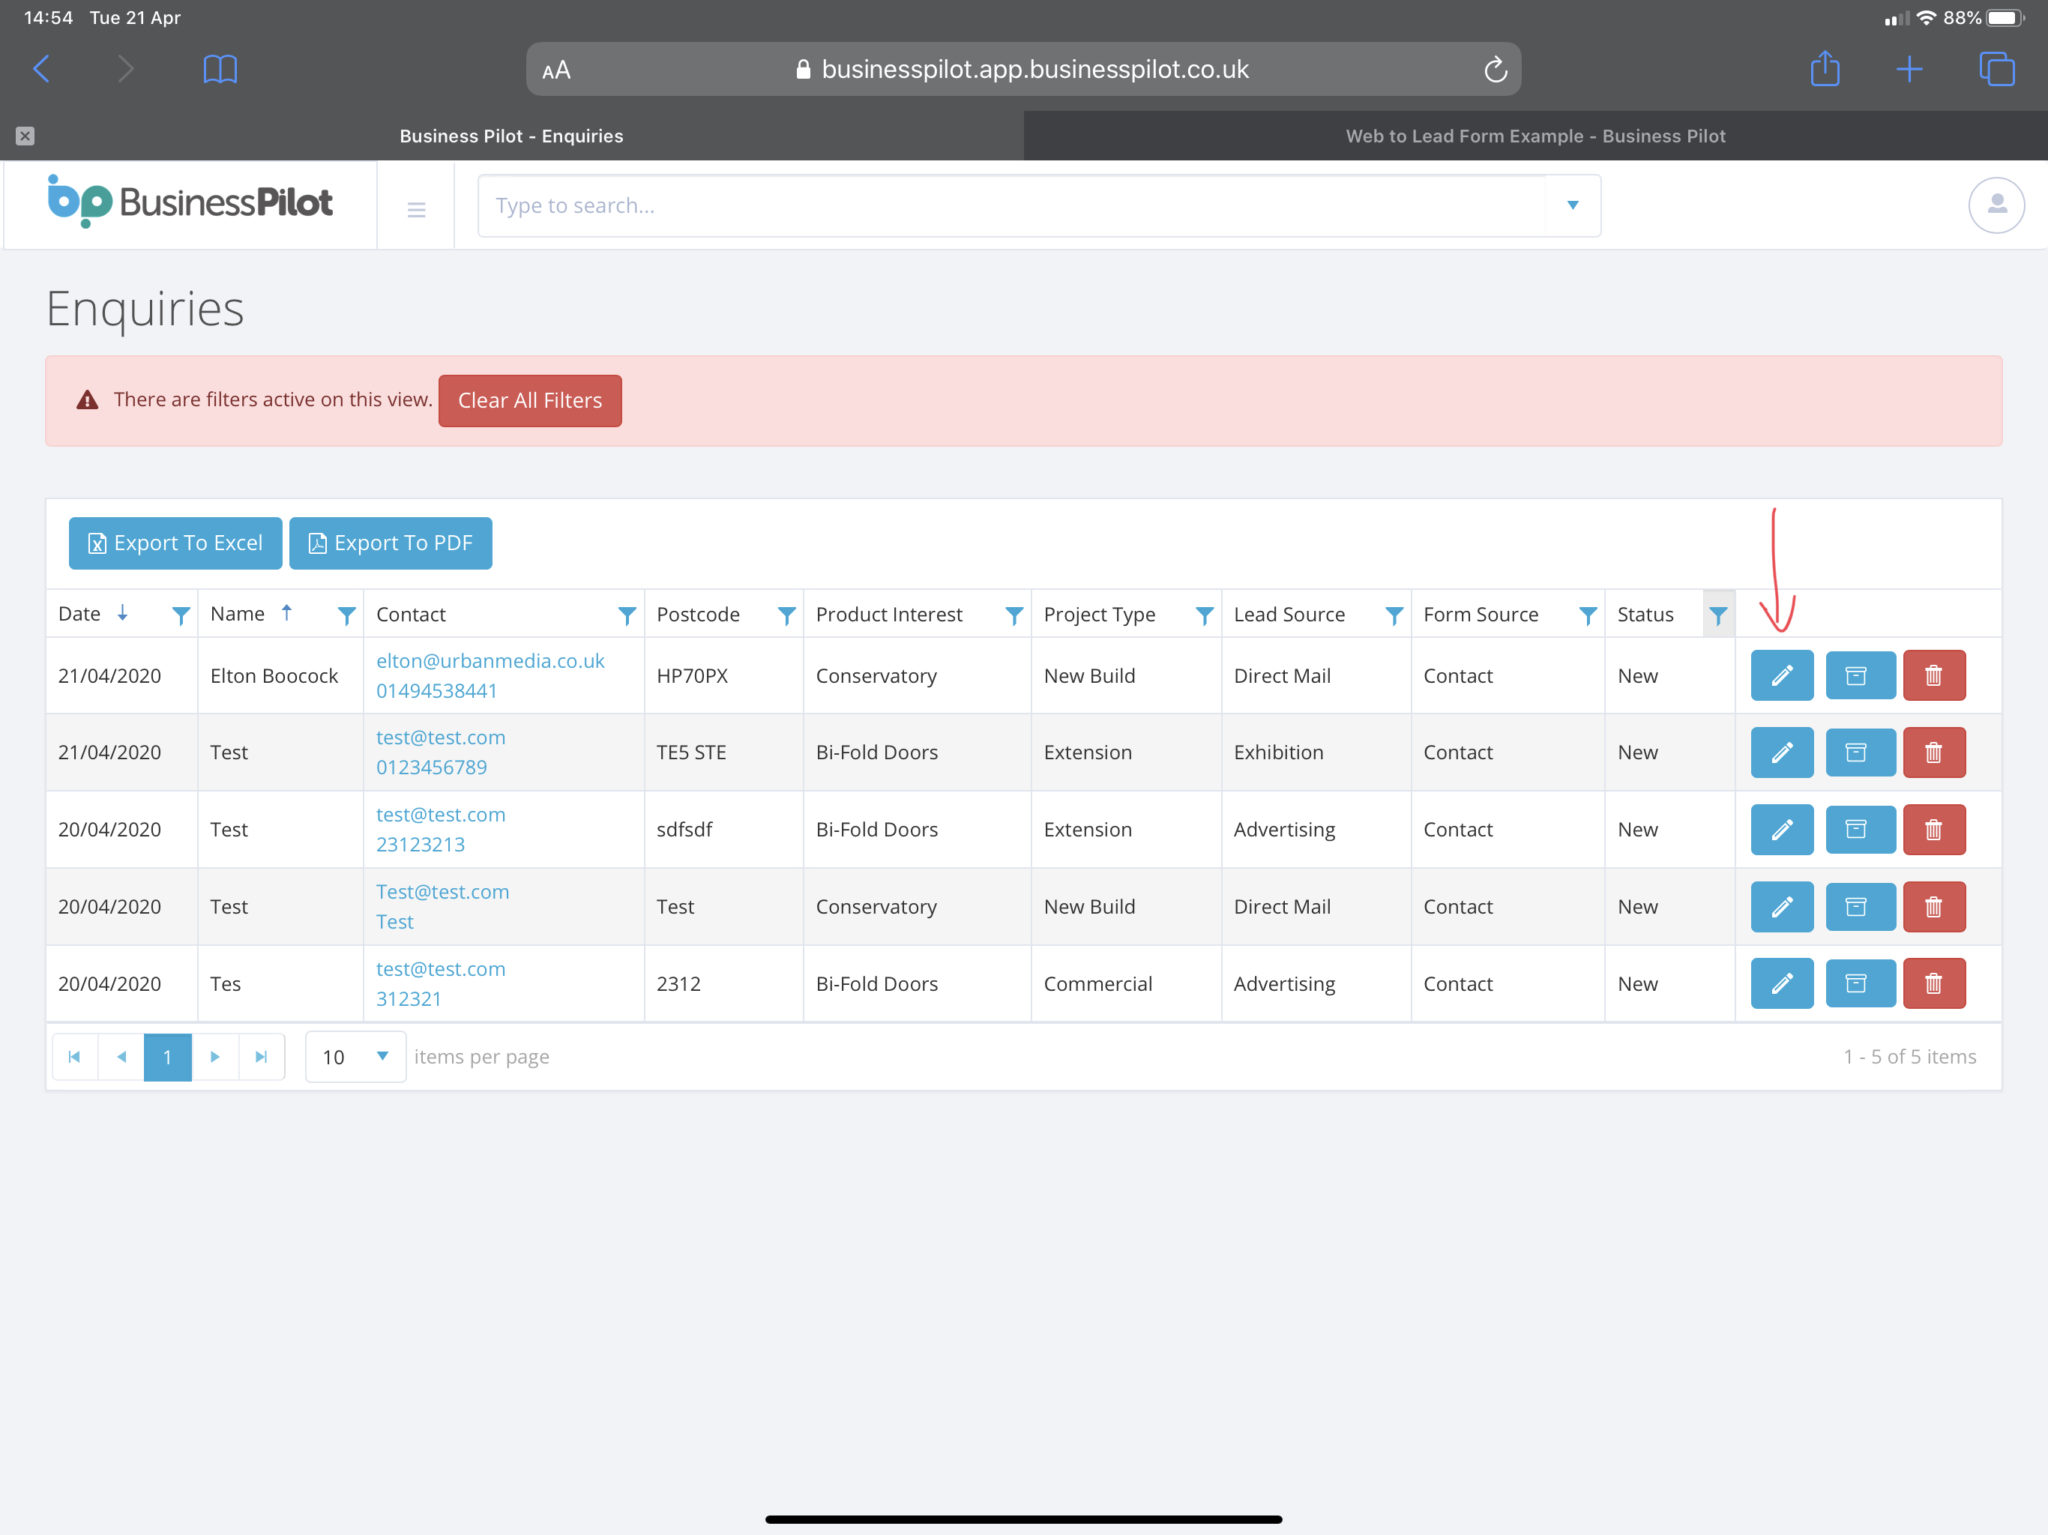
- To check that the enquiry went into your Business Pilot system. Go back to Business Pilot and go to the menu:
Followed by ‘Enquiries’
- Your test enquiry should be the top entry. You can click on the pencil to view all of the information submitted.