Setup
Once the Xero Beta integration has been enabled for your system you will see a new menu item on the Admin page:
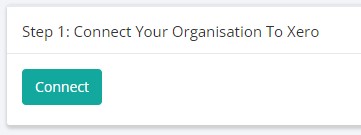
The next step is to link your BP system to a Xero account. You can do this by clicking on connect here:
You will then be asked to login to Xero:
The next step will confirm what permissions Business Pilot requires in order to access your Xero data. If you are happy click on Allow Access.

You should then be redirected back to the Xero Settings page in Business Pilot where it should show the following:

Note the line about CIS not being enabled for Sub Contractors. This is picking up on a setting inside of Xero that allows you to post invoices with CIS deductions on and Xero track these through a specific CIS Labour Income account (210). See here for details about how to enable this in Xero. Once configured it will display the following:

The next step is to sync your Xero account code with BP nominal codes:

This will attempt to match nominal codes in BP with Account Codes in Xero. Hopefully you have these mostly in line already. The system will give you a summary of what it has done by saying from X accounts in Xero Y account were matched to ones in BP. If there are unmatched codes you can then open a new tab and go to the BP Admin Menu and select under Finance, Nominal Codes.

We can see here that our Nominal Code of 400 isn’t connected to Xero. If we click on Edit, we can then select the specific Xero Account Code that we want our one in BP to match up to.

Once saved it will show the account is connected:

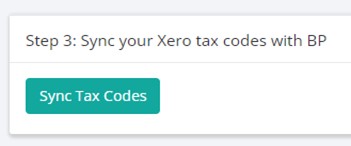
Now returning to your Xero setting you can start Step 3 to sync VAT/Tax codes between the two systems:
The system attempts to match the standard VAT codes between the systems and relies on the names of the Tax codes not having been altered in Xero from the default names. A message will be shown detailing what has been matched. You can check this by (in a new tab) going to the Admin Settings page and then under the Finance section click the VAT codes link.
Here you can see all VAT codes in BP listed along with their rates and also then whether they are linked to ones in Xero. Note that the T21 and T26 codes weren’t linked initially. This is because the Xero system we used here didn’t have domestic reverse charging enabled. To enable them in Xero please visit here for details. You can then always go back to step 3 and rerun the sync so that the codes would now look like:
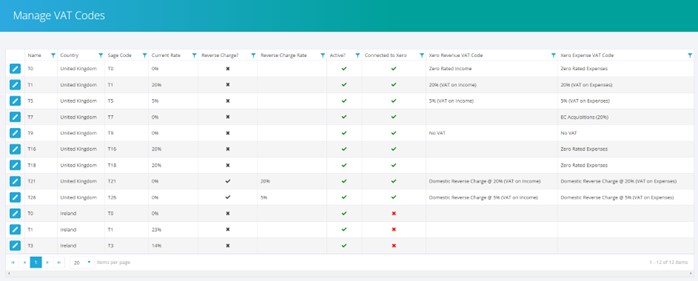
Another feature we added was the ability to rename the default VAT codes, so if you didn’t want to call it T1 you are able to change this. You can also disable VAT codes if they are not used by your company.
Returning to the Xero settings page you can proceed with Step 4:

This will attempt to match existing contacts in BP with those in Xero. This is done by using the Account Reference field of the contact and matching to the same reference in Xero. If you haven’t been using Account References contacts would need to be linked manually otherwise when you next were to add an invoice or expense a new contact in Xero would be created. These can however be merged in Xero at a later date.
Finally, step 5 gives you a few controls on how the integration operates:

The first setting Default Branding Theme relates to how your invoices appear when viewed in Xero. This is not needed for BP and BP uses its own templates to create and send invoices to customers. In the vast majority of cases this would be set to standard. The second setting allows you to set a default number of days to say when an invoice is due post the raise date. Leave this as 0 days to have the invoice due on the raise date. The last setting controls the state of invoices when they are added to Xero. The options are:
- Draft – this allows you to inspect the invoice and then submit and approve the invoice (doesn’t affect the customer account or ledgers until submitted)
- Submitted – the invoice still must be approved but the values in the invoice are live in relation to customer accounts and ledgers
- Approved – the invoice is automatically approved and live straight away with no additional user input required in Xero.
Due to the way Xero works if the setting is set to either Draft or Submitted, credit notes cannot be applied to invoices that are not approved so please be aware that if you are operating in either of these modes that functionality would not be available.
Once you are happy with your settings, please click update to save them.
Contacts
As mentioned in the setup above the contacts are sync’d between system based on the Account Number/Reference.
Xero holds a Sales number of days and a Bill number of days per contact. When we sync contacts it will attempt to pull this. So if the contact is a Supplier it will attempt to pull from Xero the Bill number of days and for anything else it will pull the Sales one. If nothing is set in Xero it will leave it blank.
If the contact is updated in BP and this date added it will also update the value in Xero for the contact. However this isn’t a vice versa, so if its updated in Xero it won’t reflect in BP.
When an invoice (or supplier invoice) is created in the system it will firstly check to see if the contact has this value set . If it does it will add the number of days on to the raise date for the due date of the invoice. If it doesn’t have it set it will default to the global setting in the Xero settings page.
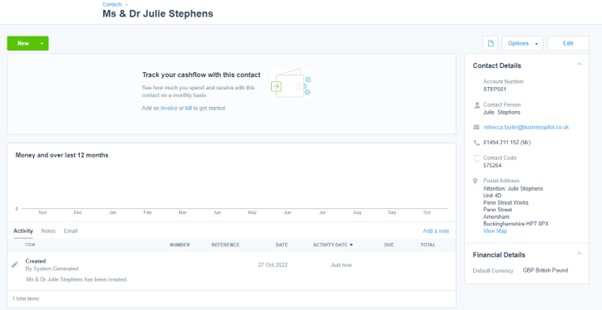
To manually link a contact you can do the following. Firstly click edit on a contact:
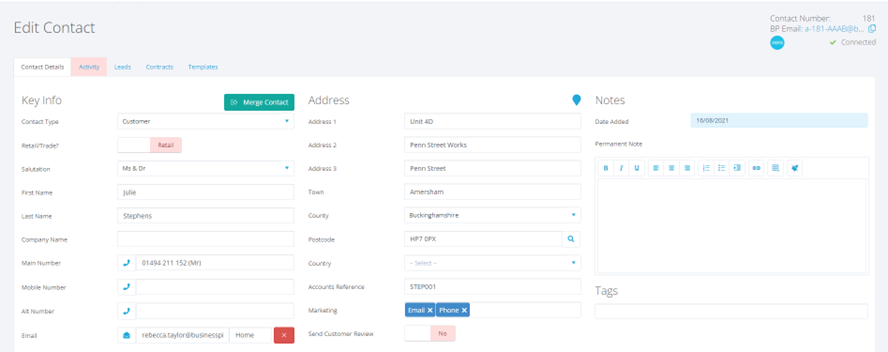
In the top right corner of the page of the contact that isn’t already connected to Xero you will see a Xero logo with a link to click connect:

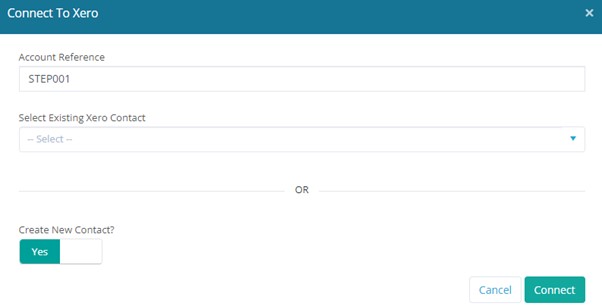
Here you can set the account reference if one hasn’t already been generated by BP and then either choose to link this BP contact with an existing contact in Xero or create a new contact in Xero. Below is an example of creating a new contact:
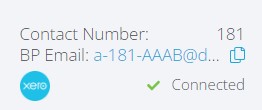
Once connected the display in the contact will show:
You can then go over to your Xero and find the details of the contact and see that it is now in that system.
Any changes that you make to the contact will then be reflected in the contact in Xero.
Customer Invoices
Once you create a raised invoice for a contact then the system will firstly check whether the contact has been linked to Xero or not. If not it will firstly add the contact and then the invoice.
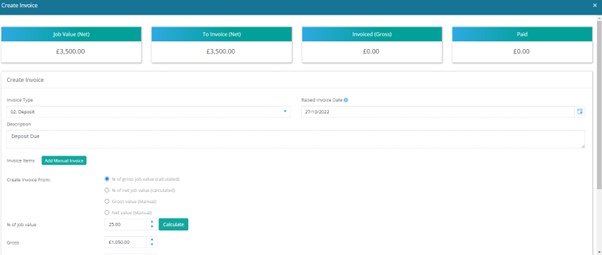
You create invoices in the same way that you normally do in Business Pilot. As an example, lets create a deposit invoice with today’s date as a raised date:
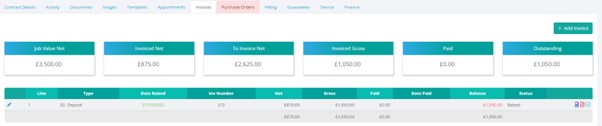
Once created your invoice will be shown in Business Pilot:
Now head over to Xero, and the business tab click on invoices:
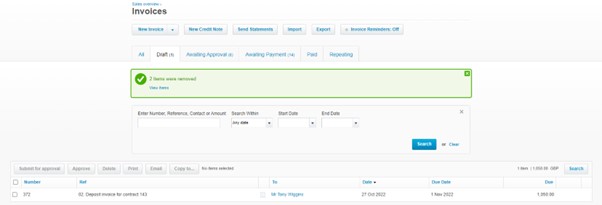
As when the invoice was created, we had the Draft Invoices option set as the default we can see that there is now a draft invoice in Xero matching the details we provided above. Clicking into the invoice we can see the elements associated to the invoice:
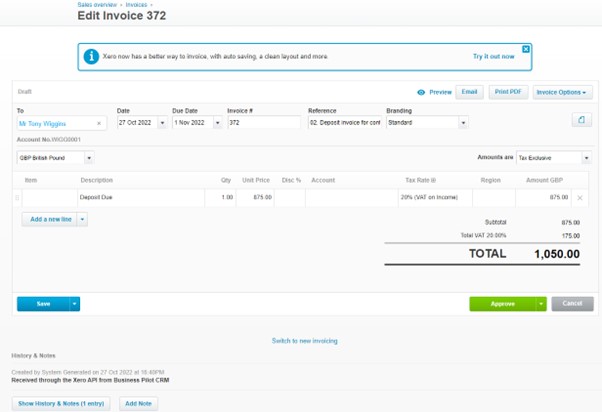
In this example, we hadn’t matched up our nominal codes fully (as per the setup section above), but you see this isn’t a problem as the invoice still comes through and can be assigned to the correct account through Xero. We see that it’s also correctly picked up the VAT rate set in the contract. The invoice number is set to match the invoice number generated in BP to keep this consistent. If you are happy with this invoice, you can then click on Approve at which point it is posted to the customer account and correct ledgers in Xero. Xero also lets you know that for any invoice, where it was created from, and you can see in the notes section above that it was received through the API from Business Pilot.
Customer Invoice Payments
Once payments received in your bank account are allocated/reconciled to invoices in Xero these payments will then be sent back through the API to Business Pilot which then adds them to the invoices in BP.
Let’s create a manual payment against the above invoice in Xero:

Once we click on Add Payment this will send the message on BP. It can take up to 5 minutes to receive the response and process it, but when it is received, we can now see the following in BP:
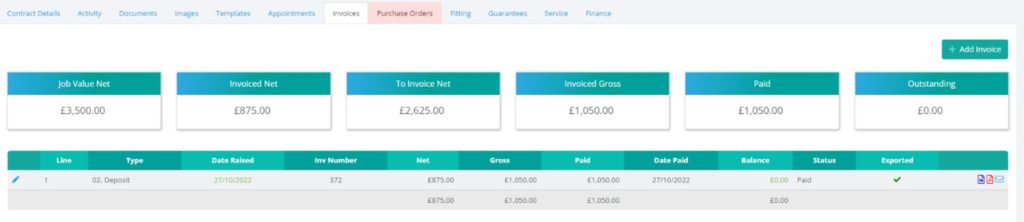
We can see that the invoice is now paid and note that it has been marked as exported as its all handled through the API.
So that we have a single data entry point, we have to disable the ability in Business Pilot to add payments against invoices in Business Pilot. This is because payments are received and allocated inside of Xero and thus avoids duplications.
Note that once an invoice is paid (fully or in part), or has had credits allocated to it, it can no longer be deleted. This is one of the rules Xero adheres too and so we have also made this the case in Business Pilot for consistency.
Supplier Invoices
Whenever a supplier invoice is recorded, or a job cost added against a contract or for example you assign stock to a job an invoice will be generated inside of Xero. The exception is whenever you mark the cost to not be exported as Business Pilot will not push this through to Xero if you do not wish it to do so for certain costs.
Lets take our contract where we have added an example invoice and firstly create a purchase order:
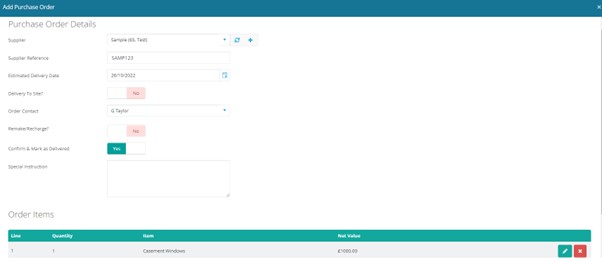
Once added edit the purchase order and add a new invoice:
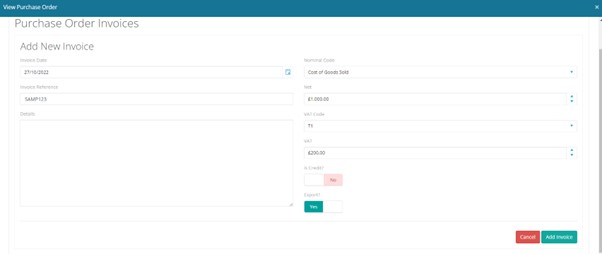
Then click Add Invoice and head over to Xero and look under Business -> Bills to pay:

We can see the cost has come over to Xero. Click into the bill:
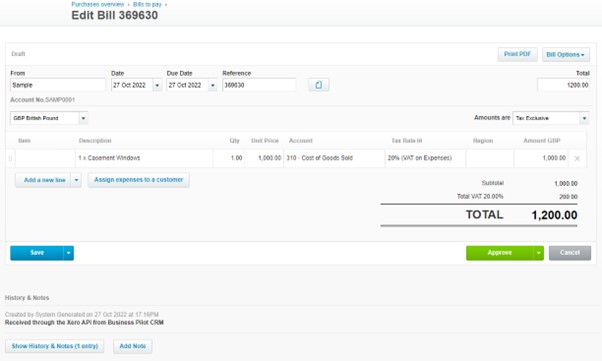
We can see it come in through the API and has correctly assigned the expense to the chosen account in Xero along with the appropriate VAT code whilst also assigning to the appropriate supplier (which was added at the time of creation of the supplier invoice in this instance).
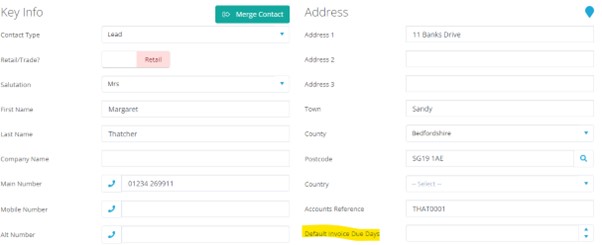
So now once a contact is connected to Xero you have this extra field in the contact record:
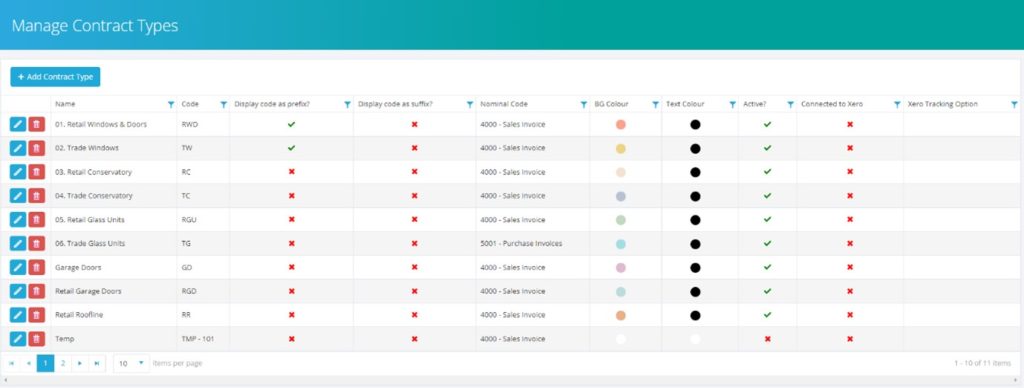
If your system is now connected to Xero and you go to manage contract types you will see the following:
To connect a contract type to a tracking category option, click edit on the contract type to see:
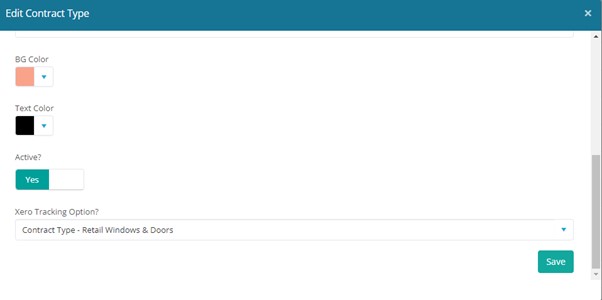
The Xero Tracking Option field shows a dropdown listing all Active options for all Xero categories. For example, we created a Contract Type Tracking Category in Xero and then under that a Retail Windows & Doors options. If we select this and save it the list of contract types refreshes and we can now see it is connected:

From now on any line on an invoice that is created from a contract type which is now linked to a tracking category option will have that tracking category option assigned to the invoice line in Xero.
We have also modified the customer invoice reference field that is passed to Xero. Previously this contained the invoice description and contract number. We have modified this to just contain the contract number.
For the invoice reference for supplier invoices this previously contained the Job Cost Id from BP. This will now display the following: Contract Number / PO Number (if from a PO) / Supplier Invoice Reference.